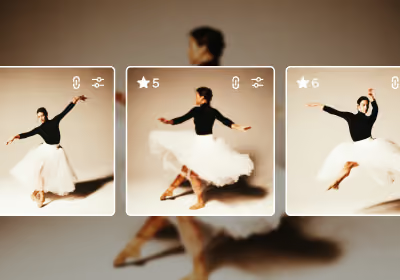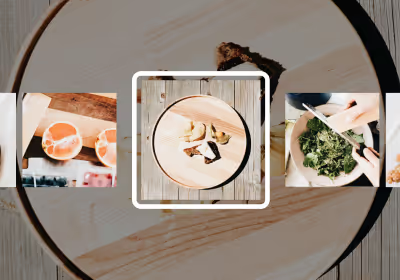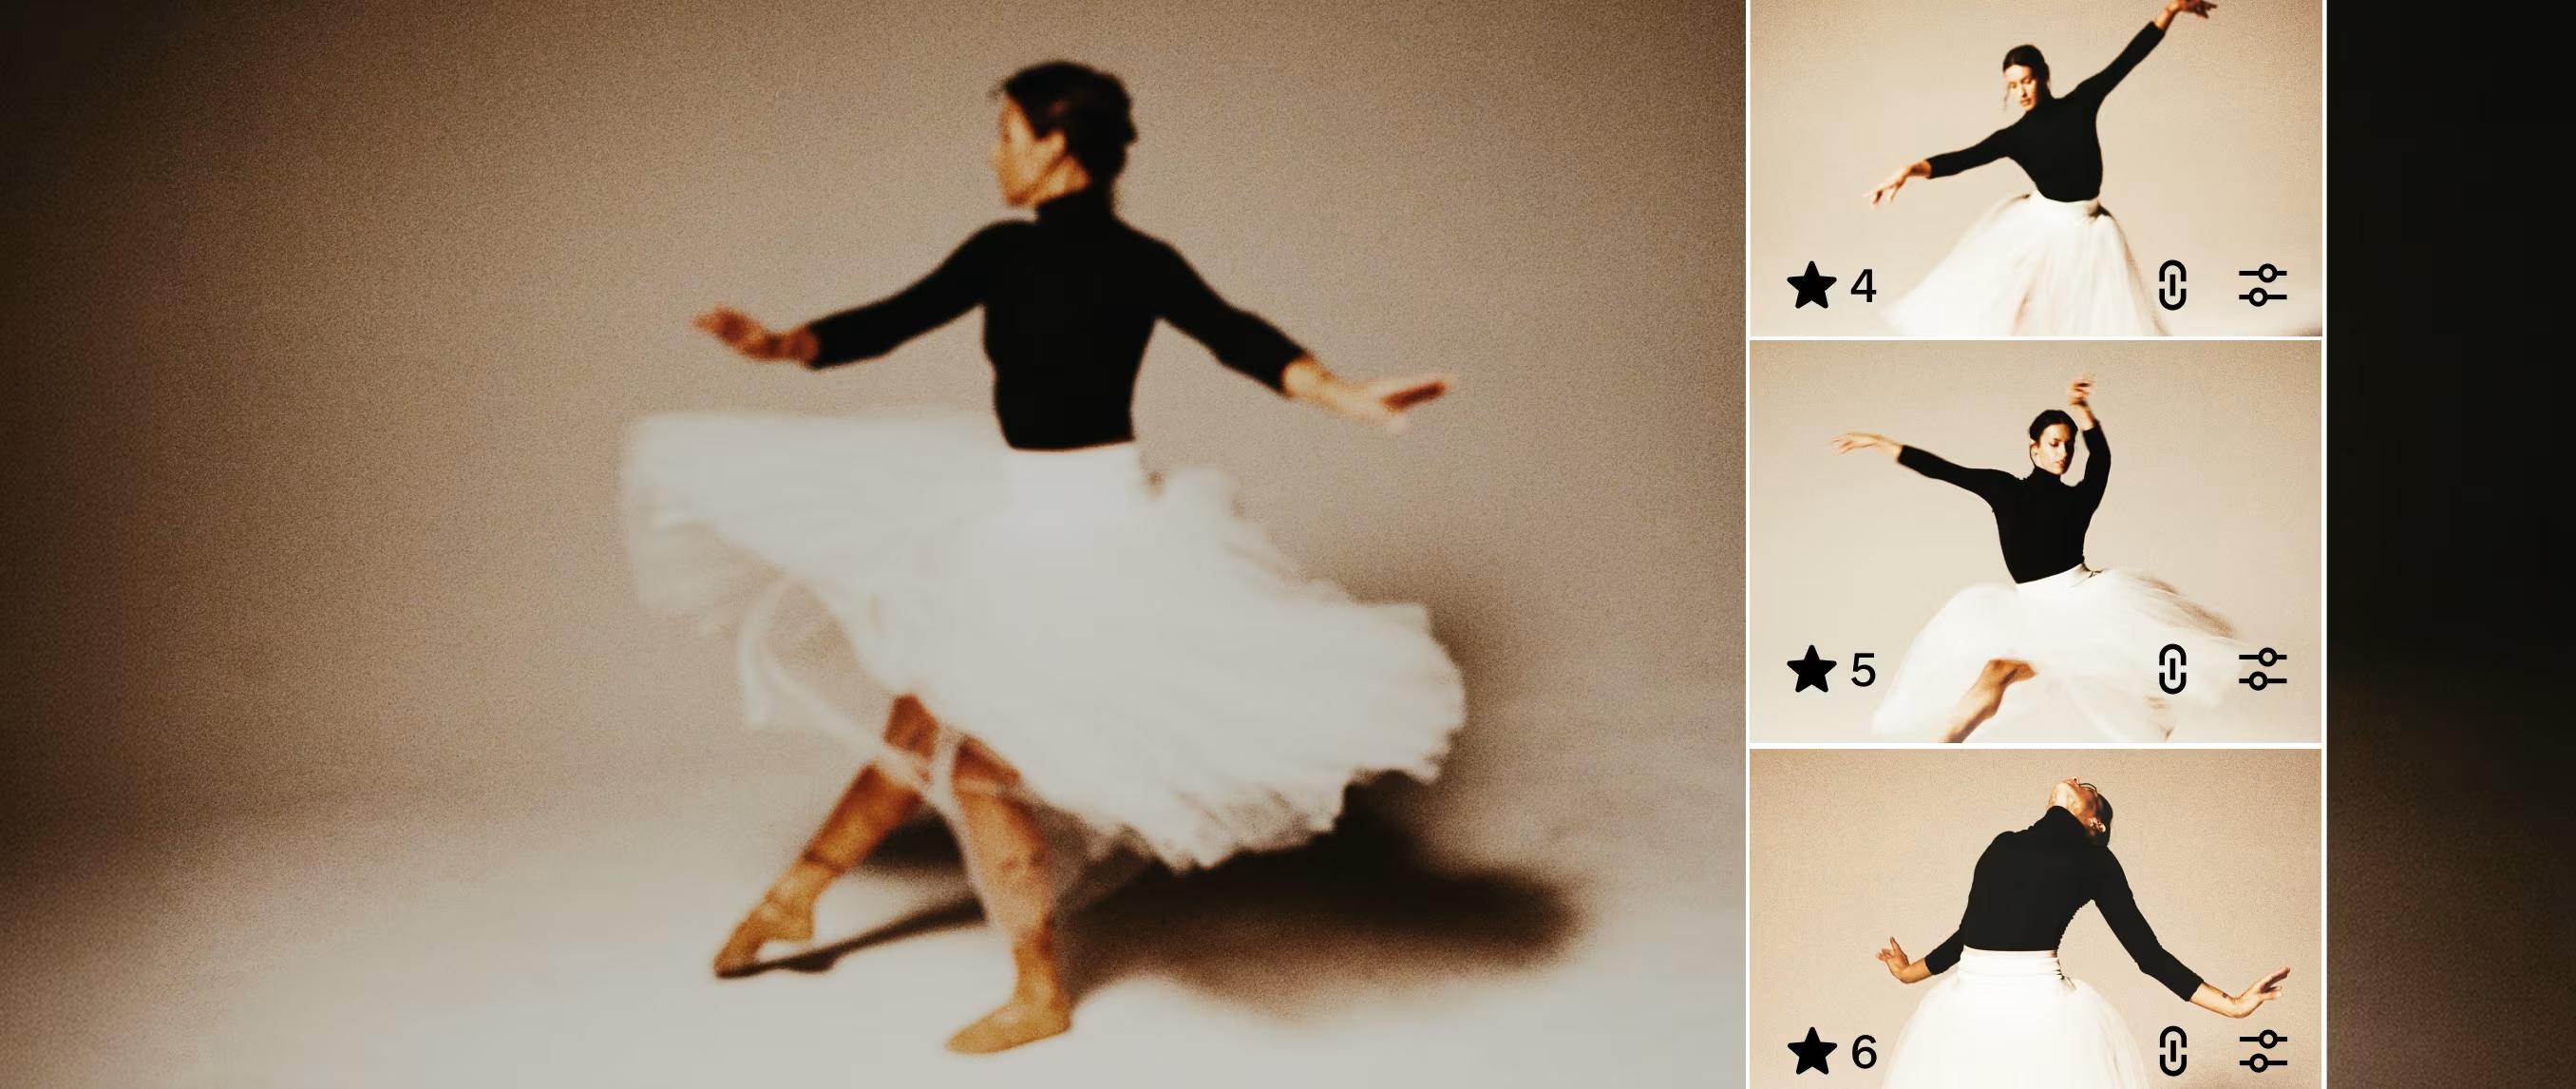
Editing hundreds of photos one at a time is one of the biggest time sinks in a high-volume photography workflow. A wedding with 500 selects, a portrait day with eight families, a brand photoshoot with 200 frames: the work adds up quickly. The challenge isn't just making each image look good. It's making the whole set feel consistent without spending hours repeating the same adjustments.
VSCO Studio Pro is built for that workflow. Select up to 100 photos, establish your look, and apply it across the entire batch at once. You can still fine-tune individual frames when they need attention, but you're not starting from scratch every time. With Style Match, you can also use a reference image to recreate its color, tone, and mood across your set, giving you a fast way to build consistency even when the starting images vary.
This guide covers the complete Studio Pro workflow, from importing and navigating your photos to making individual edits, applying adjustments across a batch, using Style Match with reference images, exporting finished files, and publishing directly to VSCO Galleries for client delivery.
What you'll learn:
- How to import, sort, and navigate photos in Studio Pro
- How to apply presets and manual adjustments to one image or a full batch
- How Style Match works and when to use it
- How to export finished files and deliver directly to clients via VSCO Galleries
In this tutorial:
- What Is VSCO Studio Pro?
- Studio Pro vs. the Main VSCO App
- Who Should Use Studio Pro?
- How to Import Photos Into Studio Pro
- How to Edit a Photo
- How to Batch Edit Photos
- How to Use Style Match
- Exporting Your Finished Photos
- From Editing to Client Delivery
- FAQ: VSCO Studio Pro
Download VSCO Studio Pro free →
VSCO Studio Pro is a professional photo editing app for iOS, purpose-built for batch editing at scale. It's a separate app from the main VSCO app, designed specifically for photographers who edit large volumes of images and need to maintain a consistent look across an entire photoshoot or portfolio.
At launch, the core workflow is: import your selects, apply a preset or Style Match a reference image, fine-tune with manual controls, and publish or export. Every step can apply to one photo or up to 100 at once.
What's in Studio Pro:
- Batch editing up to 100 JPEG or HEIC photos at once
- Unlimited batch publish to VSCO Galleries (no cap on batch size for Gallery delivery)
- Style Match: AI-powered look recreation from any reference image
- 200+ VSCO presets, including Pro Presets, with filtering by type and attribute
- Swipe-through preset preview directly while editing, without losing your edit
- Copy and paste editing for reapplying custom looks
- Full manual controls: exposure, contrast, highlights, shadows, white balance, temperature, tint, HSL, grain, fade, sharpen
- Non-destructive editing workflow with autosave status indicator
- Open and fine-tune a single image from a batch without losing your place in the batch
- Granular export control: rename files, choose exact dimensions, adjust quality and file size, JPEG or HEIC output
- Publish up to 10 images at once directly to your VSCO profile
- Cancel long-running edits, exports, and uploads in progress
- Direct publish to VSCO Galleries and VSCO profile
Studio Pro is free to download. The full editing suite requires a Pro or VSCO One membership.
These are two different apps with different purposes. You don't need to choose between them. Most photographers will use both.
The main VSCO app is a complete creative platform: photo and video editing, community, your feed, VSCO profile, AI Lab, Canvas, Capture, and the broader VSCO ecosystem. It's where you edit individual images with the full range of VSCO's creative tools, where you post to your profile, and where you connect with the VSCO community.
VSCO Studio Pro has a specialized job: editing large sets of photos quickly and consistently. It's not trying to be a complete creative platform. It's trying to be the fastest path from a day's worth of selects to a client-ready gallery. The image engine is newer and faster, the interface is designed around batch workflows, and the publish-to-Galleries integration is built directly into the delivery step.
If you edit one photo at a time and publish individually, the main VSCO app handles that well. If you're regularly editing 50, 100, or 200 photos from a single photoshoot and need them delivered fast, Studio Pro is what that workflow is built for.
Studio Pro is designed for photographers who edit volume. That includes:
- Wedding and event photographers who consistently deliver hundreds of images per job and need to maintain a consistent look across a full day of shooting in varied light
- Portrait photographers with back-to-back session days, mini session marathons, or high booking volume where post-production time directly impacts how quickly they can book and deliver the next client
- Commercial and brand photographers who need to match a specific visual direction across a full set of product or lifestyle images
- Sports and school photographers working with extremely high image counts where batch efficiency is the only practical way to deliver on time
- Any photographer who captures more than they can reasonably edit frame by frame and wants to spend less time in post
Studio Pro is currently available on iOS. If your editing workflow is primarily desktop-based, the macOS version is coming. Follow VSCO for updates.
Studio Pro works with photos from your iPhone's Photos library. Import your selects from your camera by connecting via USB to your computer, importing to Photos, then continuing in Studio Pro on your phone.
To add photos:
- Open Studio Pro and tap the + button to add photos
- Select photos from your iOS Photos library
- Tap the check mark ✓ to bring them into your Studio Pro editing space
You can add photos in batches across multiple import sessions. You don't need to add everything at once. Each imported set appears in your Studio Pro library.
Supported file types:
- JPEG
- HEIC
RAW file support is on the roadmap but not available at launch. If you shoot RAW, export JPEGs from your camera manufacturer's app or from your computer before importing into Studio Pro.
Navigating and Sorting in Studio Pro
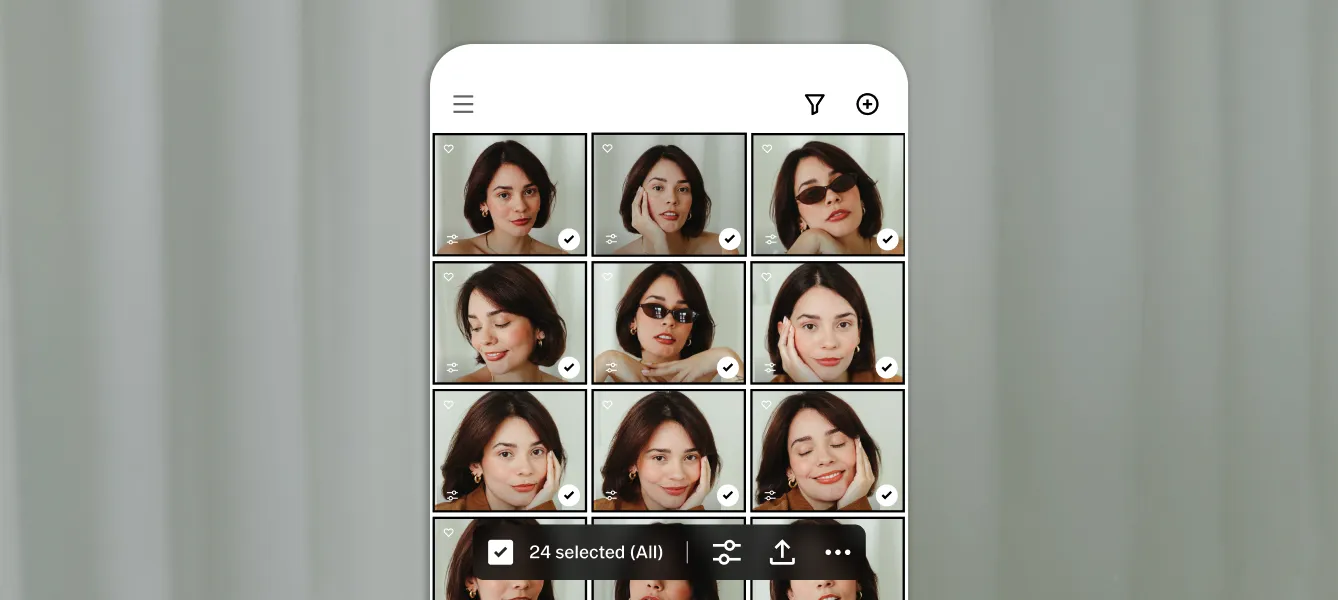
Once photos are imported, they appear in a grid view. Tap any photo to open it for single-image editing. Tap other photos to select multiple images for batch editing. The grid gives you a visual overview of the full set, making it easy to spot inconsistencies before you start editing and to identify the strongest image to use as your Style Match reference.
Single-image editing in Studio Pro works the same way whether you're editing one photo or setting up a look before applying it to a batch.
Presets
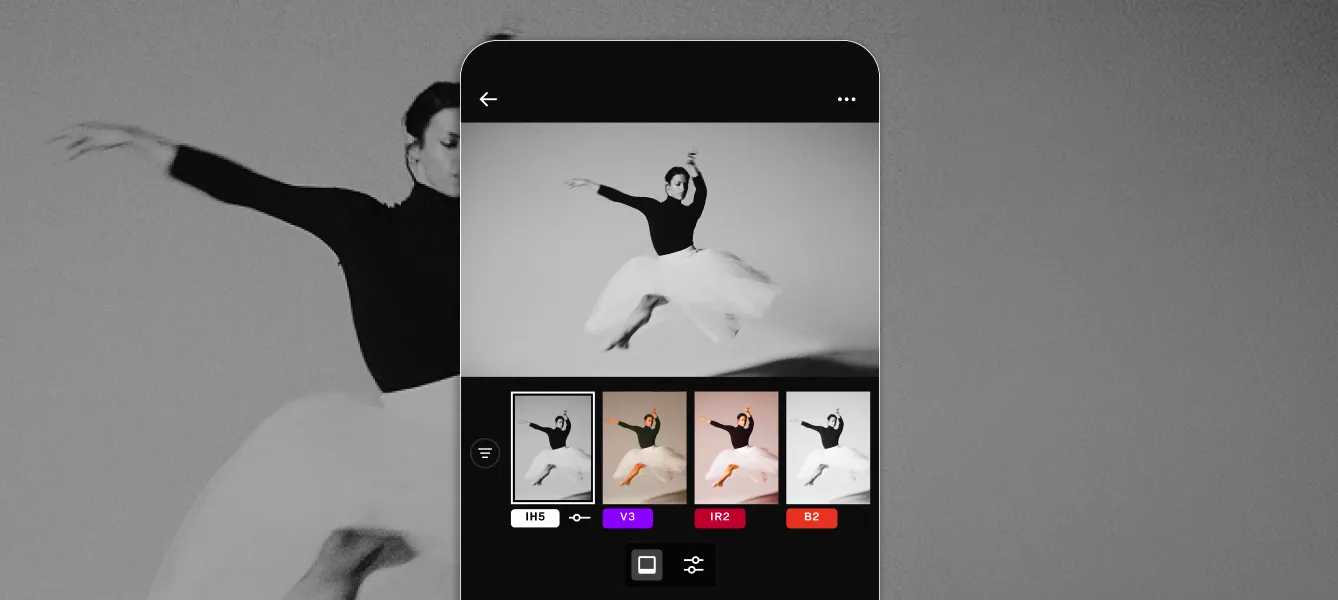
Studio Pro includes 200+ VSCO film presets, the same library built from over a decade of lab-based analog film research. These range from natural, subtle looks to more distinctive film-inspired aesthetics.
To apply a preset:
- Open a photo
- Tap the Presets panel at the bottom
- Filter presets by type or attribute to narrow 200+ options down to the look you're after
- Swipe through presets directly in the editor to preview them on your image without losing your current edit
- After applying a look, tap the same preset tile again to adjust Strength
- Tap ✓ to confirm your edits
The ability to filter and swipe-preview presets while staying in the edit view means you find the right look faster without toggling back and forth between panels. The preset you select becomes the starting point for any manual adjustments, and it can be applied to a single image or a full batch.
Pro Presets extend the library with additional looks designed for more control and flexibility. Available on Pro and VSCO One memberships.
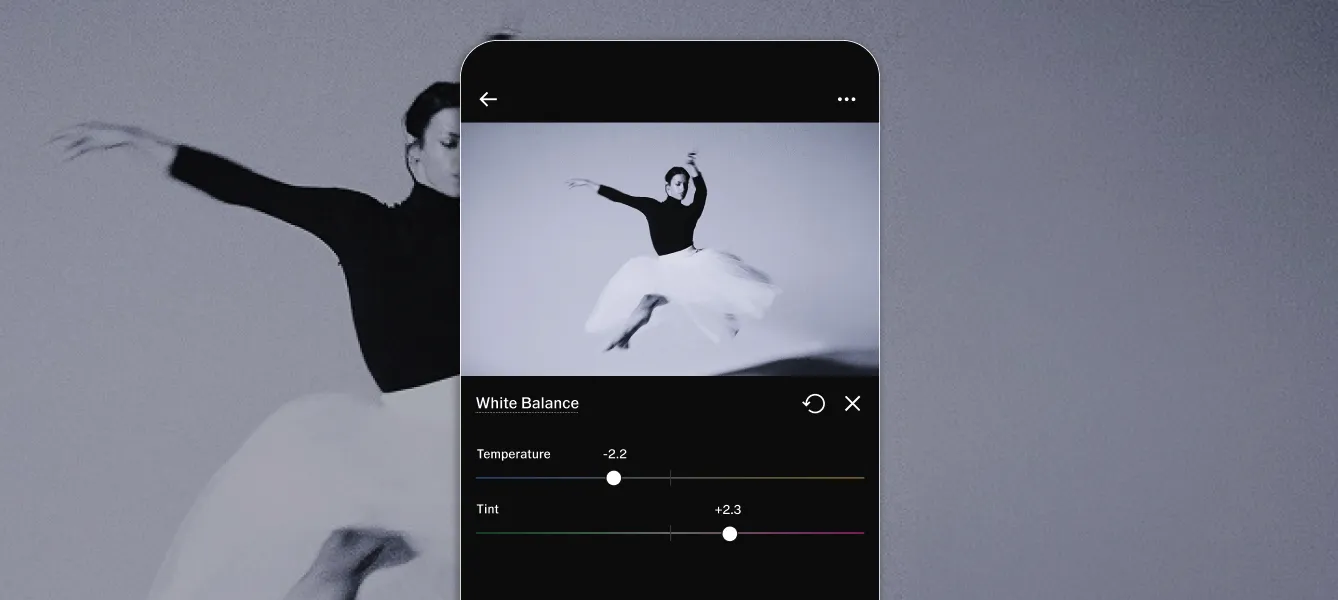
Manual Adjustments
After applying a preset, or from a clean starting point, manual controls let you refine the look precisely:
- Exposure: overall brightness
- Contrast: separation between highlights and shadows
- Highlights: recover or brighten bi-directionally
- Shadows: lift or deepen dark areas
- White Balance: correct color casts from artificial light
- Temperature: warm or cool the overall tone
- Tint: shift the color balance toward green or magenta
- HSL: target individual color channels for selective hue, saturation, and luminance adjustments
- Grain: add analog film texture with control over size and roughness
- Fade: lift the shadows for a matte, film-like look
- Sharpen: add edge definition
- Skin Tone: balance color to keep skin looking natural
Every manual control can be applied to a single image or pushed across a batch of 100.
Non-Destructive Editing and Autosave
All edits in Studio Pro are non-destructive. Your original photos stay untouched. You can reset any edit, adjust individual controls without affecting others, and change your approach at any stage without starting over. Nothing is written permanently to the image file until you export.
An autosave status indicator shows you in real time that your work is being saved as you go. No guessing whether changes were captured before you switched photos or closed the app.
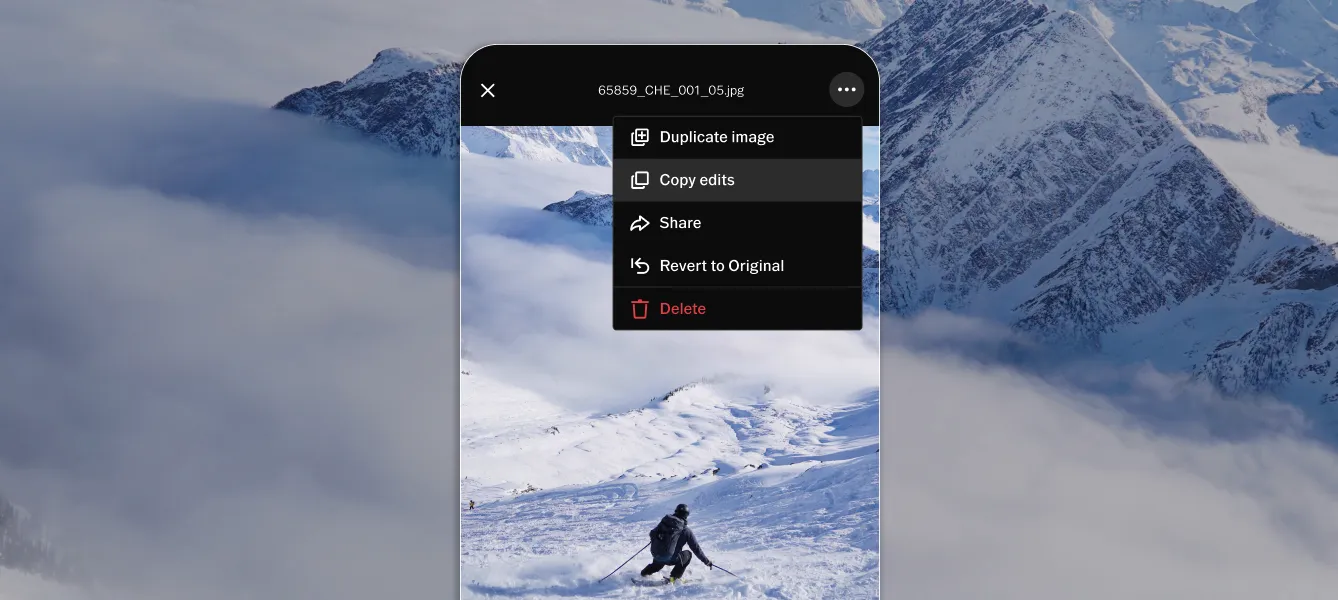
Copy and Paste Edits
If you've edited a photo in your library that has the exact look you want, you can copy that edit and paste it directly to other photos.
To copy and paste edits:
- Open the photo you've already edited in Studio Pro
- Tap the ... menu at the bottom and select Copy edits
- Select the photos you want to apply those edits to
- Tap the ... menu again, select Paste edits
The full edit transfers to every selected photo. This is a fast way to apply a look you developed on one image to a specific group of photos without running a full batch edit across your whole set.
Batch editing is the workflow Studio Pro is built around. Select up to 100 photos, apply a preset, Style Match, or any manual adjustment, and the edit applies to every selected image at once.
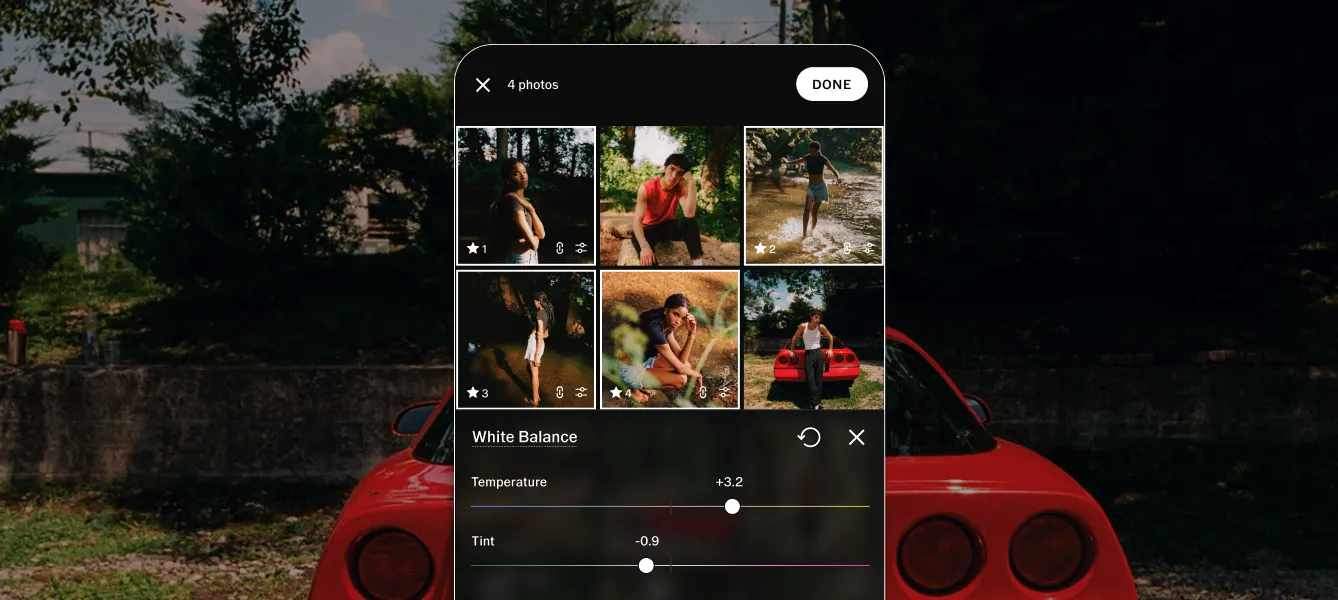
Selecting Multiple Photos
To select multiple photos:
- In the grid view tap any photo to enter selection mode
- Tap or drag to batch select additional photos (up to 100 total)
The number of selected photos appears in the interface. Once selected, any edit you apply goes to every photo in the selection.
Applying Edits and Refining Photos
With photos selected:
- Tap the editing icon. From there, all edits apply to all selected photos
- Consider starting with a preset. Tap one to apply, tap it again to refine Strength
- Switch to manual tools and sliders to make any adjustments
- In the batch editing view, tap an individual photo to enter Isolated Editing. From there, fine-tune the photo even further. Save individually, or merge your edits back to the whole batch
This workflow handles the bulk of the edit in one pass. In practice, most photographers select their full set, apply batch edits, then go through individually to adjust any images where the light was significantly different. A few minutes of individual attention rather than editing every frame from scratch.
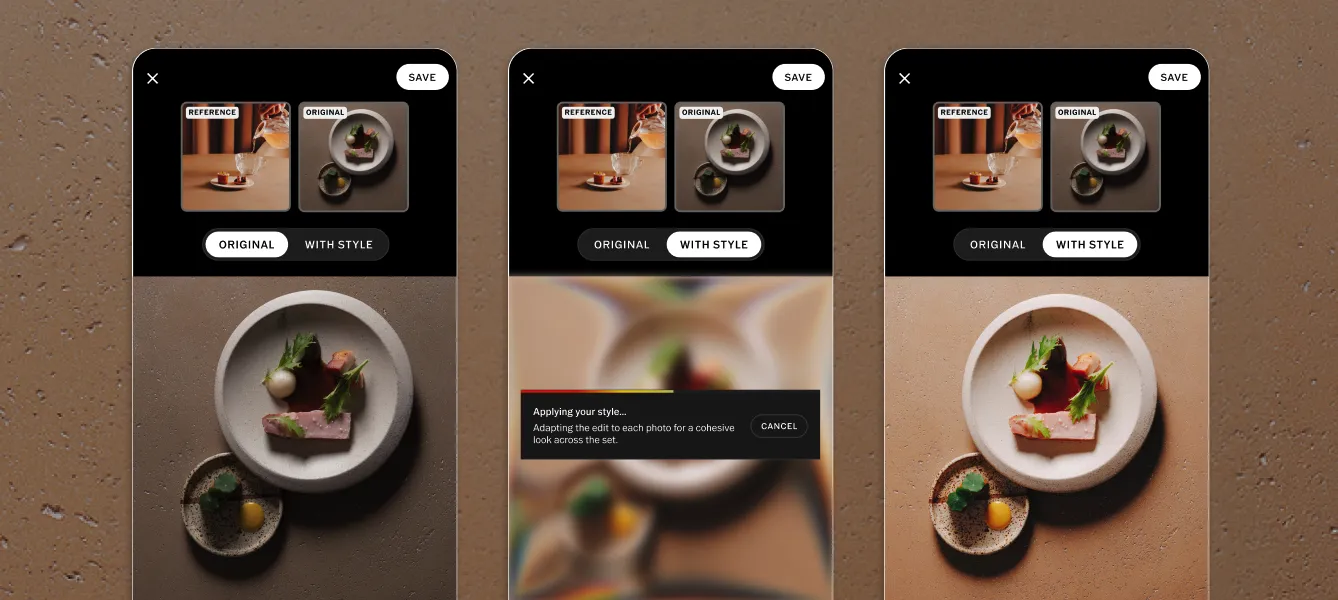
Style Match is Studio Pro's AI-powered look recreation tool. Point it at any image (one you've already edited, one from a client brief, one you're inspired by) and it analyzes the color, tone, and mood of that image and recreates that character across your photos using a tailored combination of presets and manual adjustments.
- Recreate your own signature edit at scale: edit one hero image from a session exactly the way you want the whole shoot to look, then Style Match the rest of the set to that image.
- Match a client reference: when a client sends you a brief with a specific look, use that reference image directly in Style Match rather than manually trying to reverse-engineer the settings.
- Experiment with new looks: drop in an image that inspired you and see how that color treatment translates to your photos.
To Style Match:
- Select the photos you want to apply the look to (up to 100)
- Tap the Edit icon, then tap the AI (lightning) icon. Select Style Match
- Choose a featured reference photo, import one, or select an existing edit in Studio Pro
- Studio Pro analyzes it and generates the Style
- Compare the originals with the new Style Match edits
- Tap Save to apply it across all selected photos
Adjust and Refine After Style Match
After applying a Style, the manual controls are still available to push specific adjustments further. Increase grain, shift the white balance, open up the shadows.
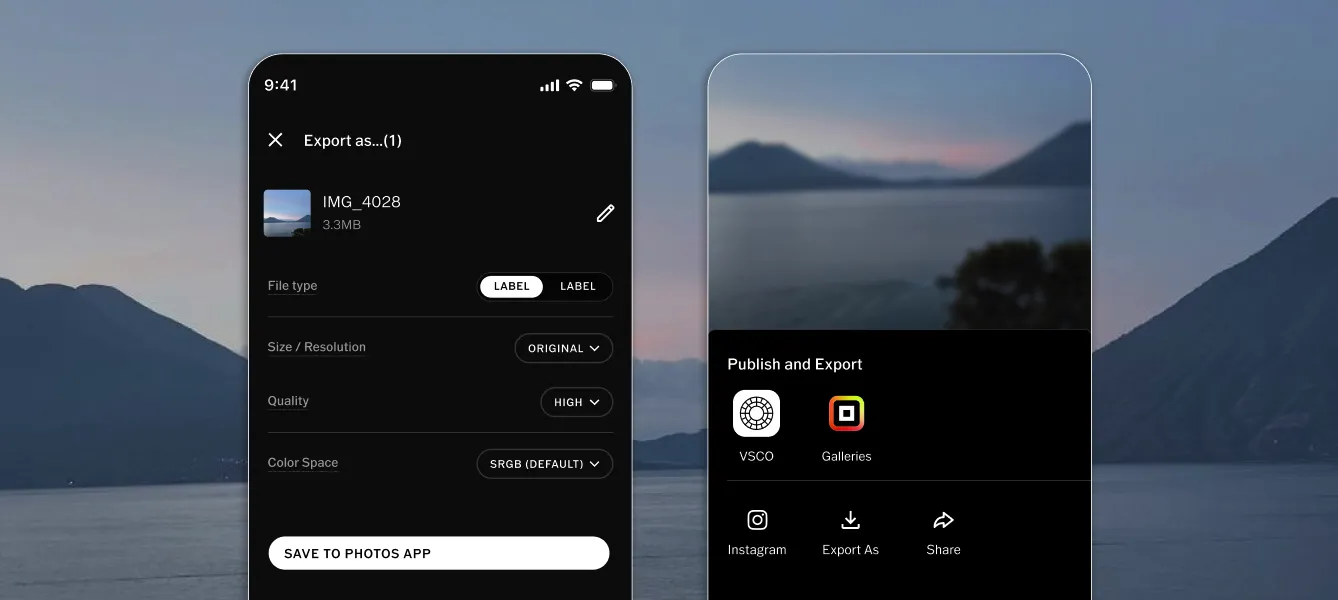
Studio Pro gives photographers granular control over every aspect of export. The right file name, the right size, the right quality, ready for wherever the images are going.
To export:
- Select the photos to export
- From your main Library tap the Share (arrow) icon
- Or, after editing, tap the (•••) in the top right. Select Share.
- Tap Export As
- Batch rename the files (pencil icon), select your desired file type, set the resolution, and choose the quality
- Tap Save to Photos App
File naming: rename exported files with a custom naming convention: prefix, sequence numbering, and other identifiers. Files arrive organized and ready to deliver rather than named whatever your camera assigned them.
File type: JPEG or HEIC.
Size/Resolution: choose the output dimensions. A portrait session file might come off the camera at over 50 megapixels. If a client needs web-optimized images for a launch, downscale to 2000 pixels or less.
Quality: control compression to get the file size you need. A 25MB original can export at 5MB for web or email delivery without manually resizing anything.
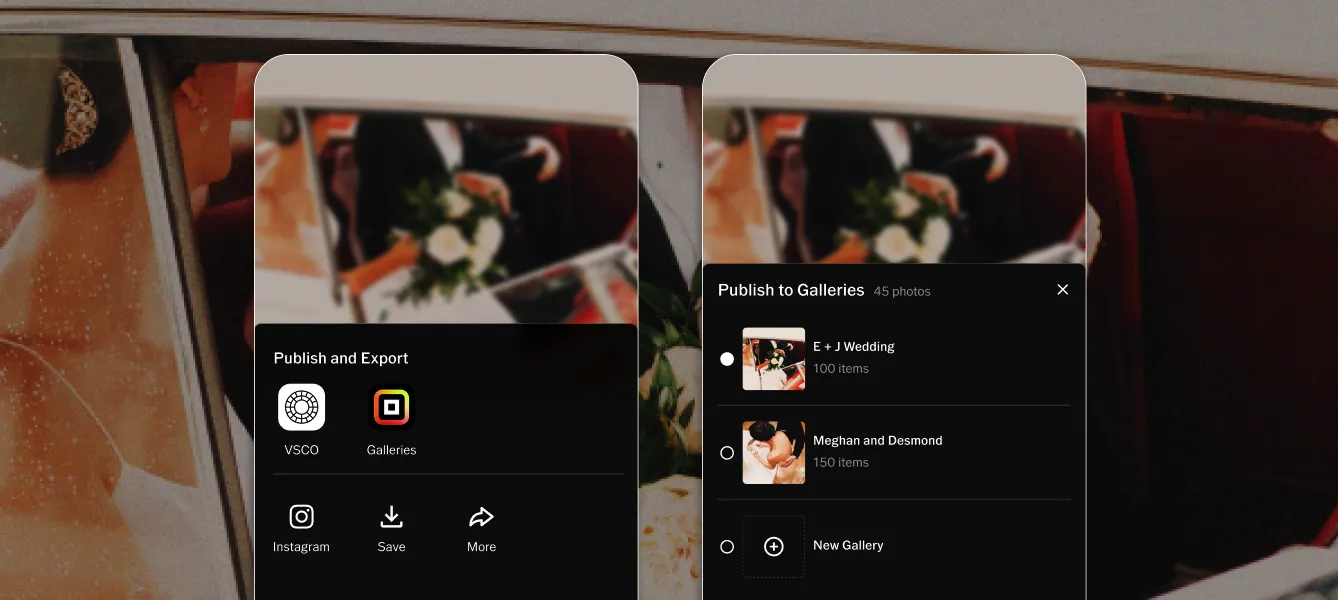
Studio Pro to VSCO Galleries
After editing, publish your finished photos directly to a VSCO Gallery without any export, re-upload, or app switching. There's no cap on batch size when publishing to a Gallery. Send your full photoshoot at once, not in pieces.
To publish to a Gallery:
- Select the photos to publish
- From your main Library tap the Share (arrow) icon
- Or, after editing, tap the (•••) in the top right. Select Share.
- Tap Galleries
- Add to an existing Gallery or Create a new one
- The images upload directly to your Gallery
If you need to stop a long upload in progress, cancel it without waiting it out. The Gallery is live as soon as the upload completes. Share the link with your client immediately. Connect the Gallery to the client's job in VSCO Workspace and the delivery email goes out from the same record as the contract and invoice.
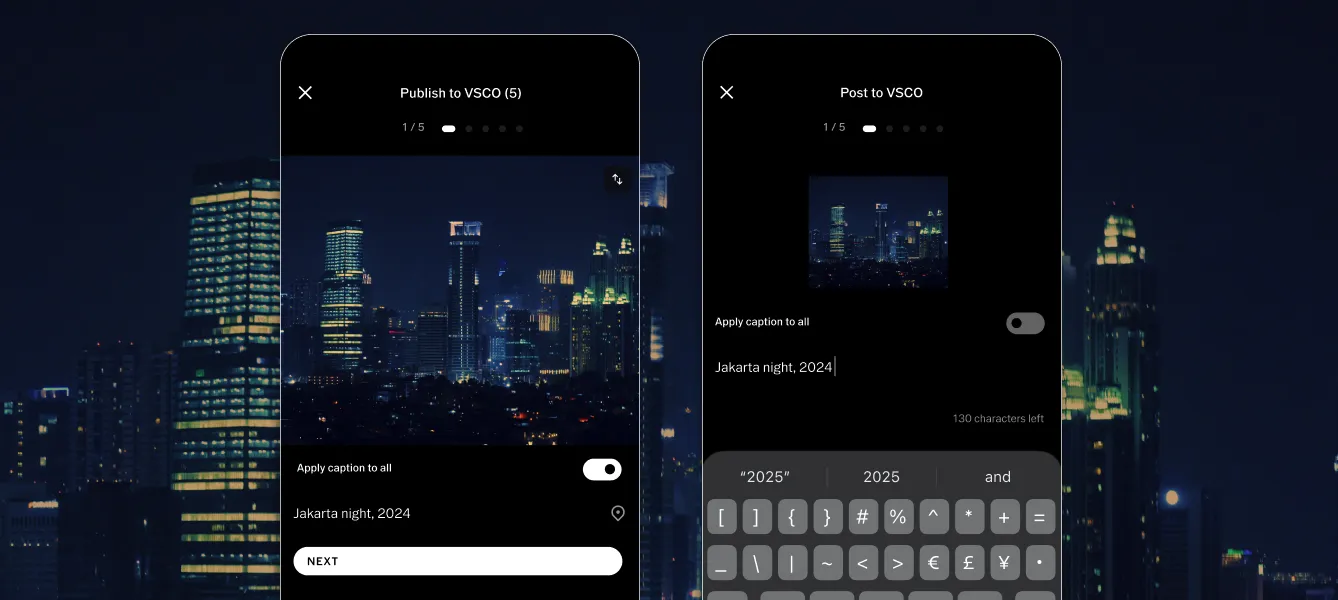
Studio Pro to Your VSCO Profile
Publish up to 10 images at once directly to your VSCO profile.
To publish to your profile:
- Select the photos to publish
- From your main Library tap the Share (arrow) icon
- Or, after editing, tap the (•••) in the top right. Select Share.
- Tap VSCO
- Apply captions and hashtags
- Tap Post
Is Studio Pro free?
Studio Pro is free to download from the App Store. The full editing toolkit, including batch editing across 100 photos, Style Match, and Pro Presets, requires a Pro or VSCO One membership. A free account gives you access to the app and a limited set of features to try before upgrading.
How many photos can I batch edit?
Up to 100 photos per batch. There's no limit on how many photos you can import into Studio Pro total. You can work through a large shoot in multiple batches if needed.
Does Studio Pro edit RAW files?
Not at launch. Studio Pro currently supports JPEG and HEIC files. RAW support is confirmed on the product roadmap. If you use RAW, you can export JPEGs from your camera app or from your computer before importing into Studio Pro.
How is Studio Pro different from the VSCO app?
The VSCO app is a complete creative platform covering editing, community, your profile, AI Lab, Canvas, and more. Studio Pro is purpose-built for pro-level workflows: editing large sets of photos fast. It has a newer image engine optimized for batch performance, Style Match for AI-powered look recreation, and a direct publish path to VSCO Galleries for client delivery.
Is Studio Pro available on desktop?
iOS only at launch. A macOS version of Studio Pro is coming, follow VSCO for release updates.
What file formats does Studio Pro export?
JPEG and HEIC. You can control dimensions, quality/compression, and file naming at export.
Can I use Style Match with a client's reference image?
Yes. Save the reference image to your iOS Photos library, then select it as your Style Match source in Studio Pro. The app analyzes the color, tone, and mood of the reference and applies that character to your selected photos.
What's the difference between a batch edit and copying and pasting edits?
A batch edit applies a preset or manual adjustment to all selected photos at once from within the editor. Copying and pasting edits lets you take the complete edit from a specific photo you've already finished, including the preset and all manual adjustments, and paste it directly to one or more other photos. Use batch editing to apply a look across your full set in one pass. Use copy and paste when you want to match a specific photo's edit precisely without rebuilding it from scratch.
Can I make individual adjustments after applying a batch edit?
Yes. After applying a batch edit, tap into any individual photo in the selection to make image-specific adjustments without leaving the batch workflow. Those overrides apply only to that photo, or you can choose to apply them back to the whole set.
Start Editing Faster
Post-production doesn't have to be the part of the job that takes the most time. A batch editing workflow can take hundreds of selects from import to a client-ready gallery in minutes rather than hours, giving you more time for the work that matters and helping clients receive their images sooner.
Download Studio Pro, import your next set of selects, and make your first batch edit.
Download VSCO Studio Pro Free →
Explore VSCO One →
Get Started With VSCO Galleries →