Most camera apps separate the creative decision from the moment. You capture, then you style.
VSCO Capture reverses that: choose your look before you press the shutter, and what you see in the viewfinder is what you capture. The color, the tone, the film character: built in from the start, not applied afterward.
That shift changes what you pay attention to while framing a scene. When the aesthetic is visible as you compose, you read the light differently, frame differently, and make decisions that would otherwise happen at a desk.
This guide covers everything you need to start using Capture effectively: the interface, presets, manual controls, film effects, RAW formats, video, and how your images flow into the VSCO app for further editing.
What you'll learn in this guide:
- What Is VSCO Capture?
- Capture vs. iPhone Camera vs. VSCO App
- Compatibility and Requirements
- Your First Photo in 60 Seconds
- Getting to Know the Camera Interface
- Choose Your Look Before You Press the Shutter
- Use Manual Controls for More Precision
- Choose the Right Photo Format
- Add Film Effects as You Capture
- Record Video With Live Presets
- What Happens After You Capture
- Photograph With More Intention
- FAQ

VSCO Capture is a free iPhone camera app built around a single idea: make your aesthetic decisions before you press the shutter, not after. Apply any of 50+ live film-inspired presets, shape the image with Grain, Bloom, and Halation effects, dial in manual controls, and photograph in RAW, all in real time, all before the frame is captured.
Every preset in Capture is non-destructive. The original image is always retained, meaning you can modify or swap the preset after the fact without starting from scratch.
Features:
- 50+ live film-inspired presets, including We The Creator presets developed with VSCO photographers, apply to both photo and video
- Film effects: Grain (Strength, Size, Color), Bloom, and Halation (photo only)
- Auto and Manual capture modes
- Manual controls: Flash, Exposure, Shutter Speed, ISO, White Balance (photo only)
- Photo formats: HEIC, JPEG, RAW, ProRAW
- Resolution: 12MP and 48MP
- Video recording with live presets (effects and manual controls not available in video mode)
- Tap-to-focus and automatic macro mode
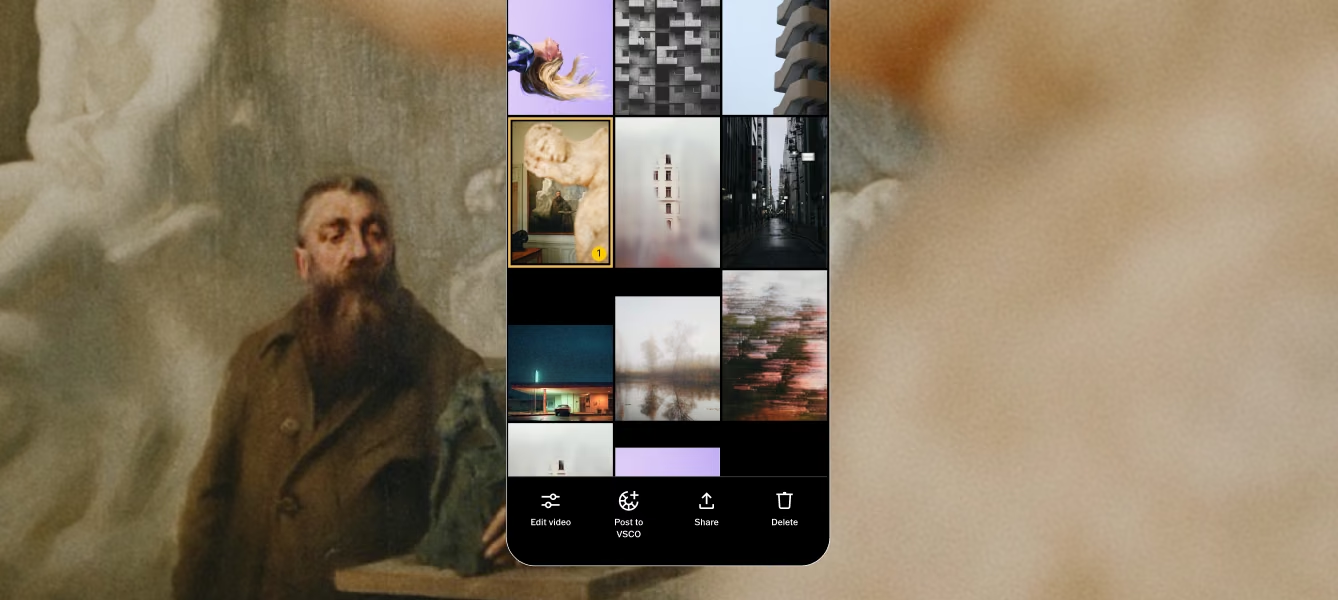
- In-app gallery
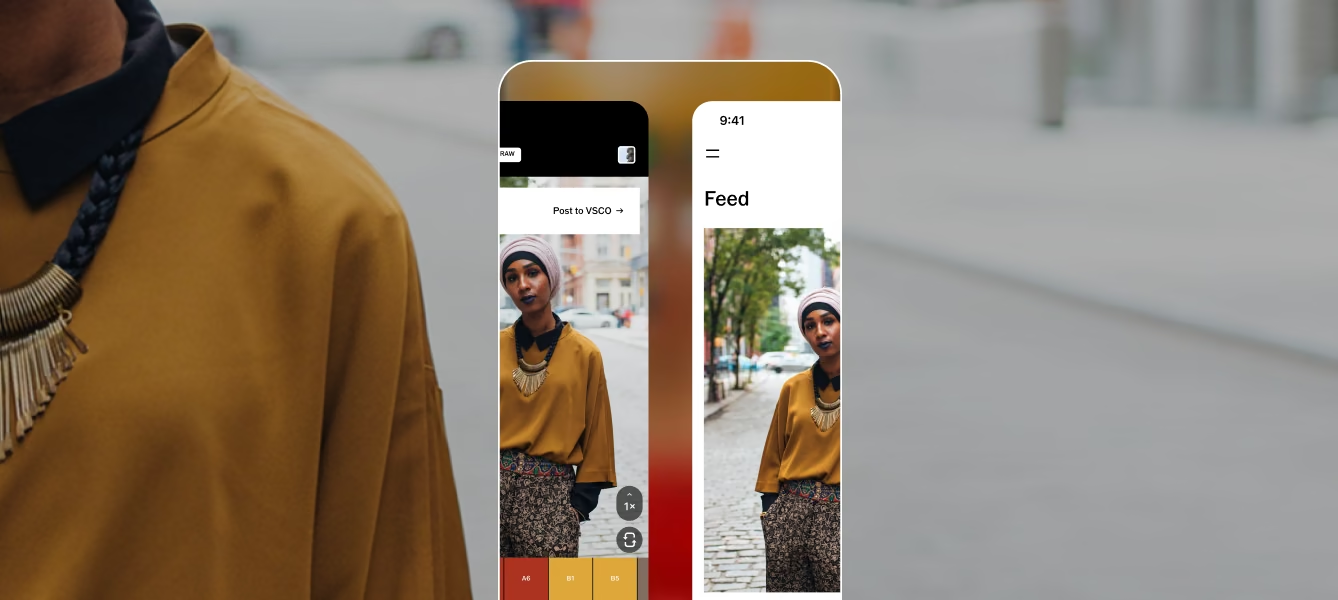
- One-tap post to VSCO profile
- Syncs to VSCO app for further editing
- Lock Screen widget, Action button, and iOS 26 camera button support for instant access
- Free to download and use. All presets, manual controls, and film effects included
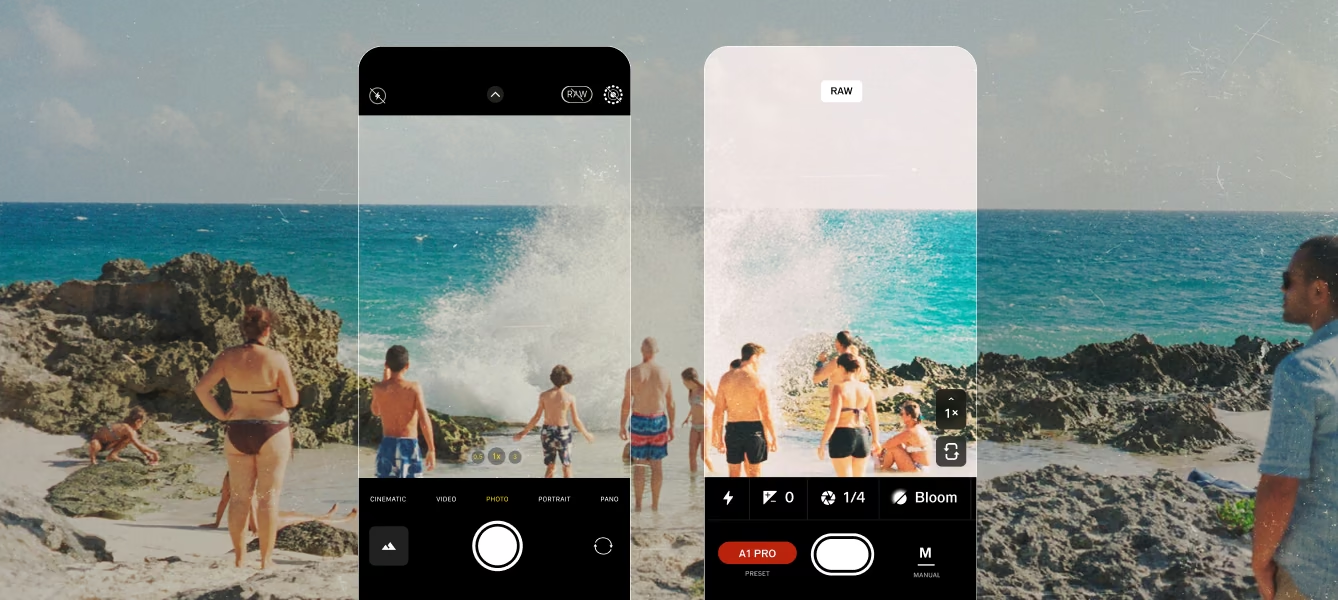
Use the iPhone Camera when: You want computational photography making most decisions automatically, or need Apple ecosystem features.
Use VSCO Capture when: You want to see a specific visual treatment as you compose, need manual control over exposure, shutter, ISO, or white balance, or want a consistent aesthetic across what you're capturing without editing every frame afterward.
Use the VSCO app when: You want to refine, color grade, apply AI tools, and share the images you've already captured.
Platform: iPhone only, not available on Android
Minimum iOS: iOS 16.6 or later
VSCO account required: Yes, needed to use Capture
RAW/ProRAW: Available on supported iPhone models. Check Apple's documentation for your specific device
48MP: Available on supported iPhone models (iPhone 14 Pro and later)
Quick access: Lock Screen widget, Action button assignment, and iOS 26 camera button mapping all supported
Before going deeper into any individual feature, here is the complete first-use workflow from open to delivered photo:
- Download and open VSCO Capture. Sign in to your VSCO account.
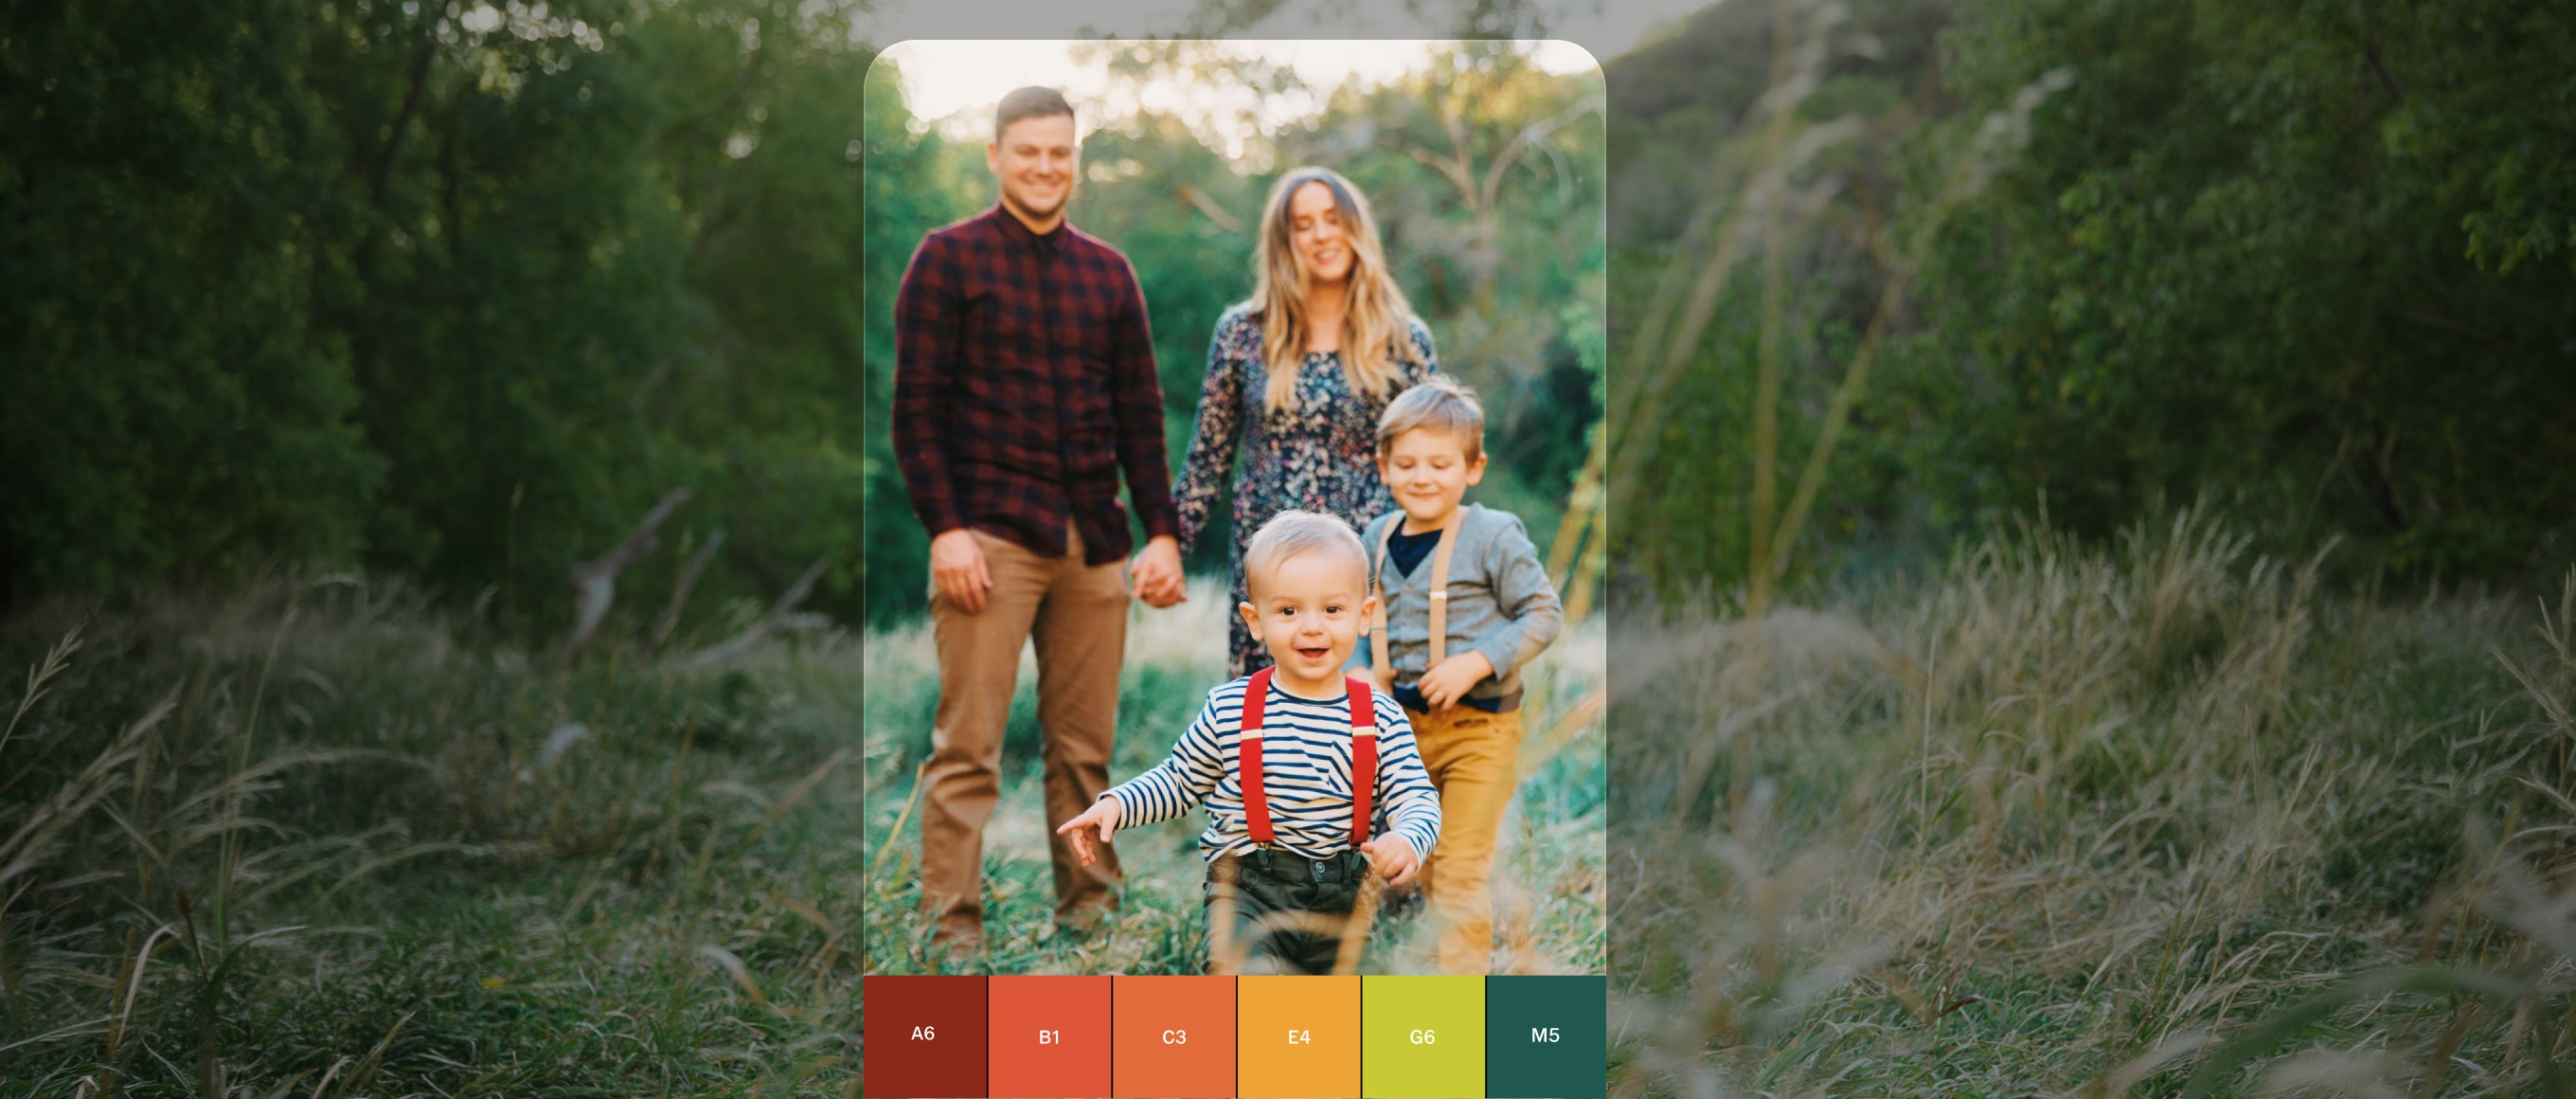
- Tap and scroll the preset strip at the bottom to browse. Tap any preset to apply it live, tap it again to adjust Strength.
- Tap your subject to set focus. Slide up or down to adjust exposure from the same tap
- Press the shutter to capture the image
- With a photo selected in your gallery, tap Edit image to go the VSCO app for further editing, or Post to VSCO to go straight to your VSCO Profile.
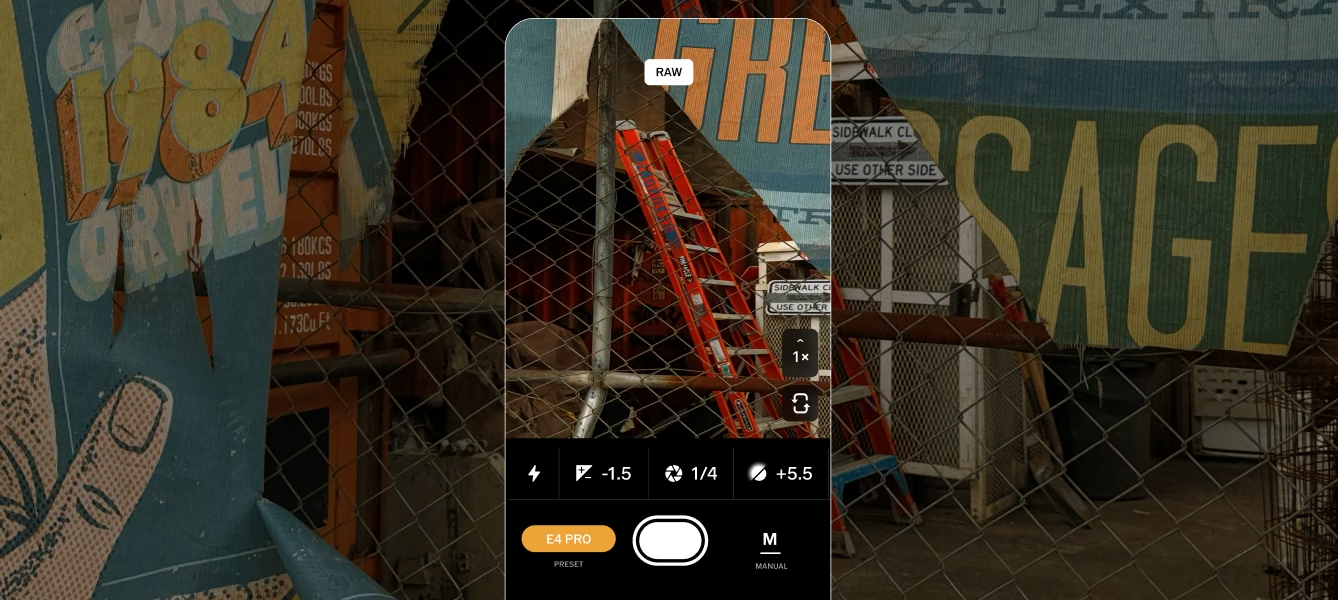
The Capture interface is organized so the controls you reach for most are reachable without leaving the viewfinder.
Key interface elements:
- Top bar left: Hamburger menu. Camera Settings (save options, file, grid), Support
- Top center: File format and resolution selector. Tap to switch between HEIC, JPEG, RAW, ProRAW, 12MP, 48MP
- Top bar right: Your Capture photos, accessible from the gallery icon
- Bottom right: Mode toggle, switches between Auto, Manual, and video modes
- Bottom bar: Preset tray, shutter button
Auto vs. Manual Mode
Tap the A/M toggle in the bottom right to switch modes.
Auto: The camera handles exposure automatically. You control the preset, effects, and focus. Good for fast-moving situations where you want to stay focused on composition.
Manual: You control exposure, shutter speed, ISO, and white balance using dials that respond in real time. Good when the scene requires a specific technical decision: slow shutter for blur, high ISO in low light, corrected white balance under artificial light. Note: manual controls are available for photos only, not video.
Composition Grid
Open the hamburger menu and go to Camera Settings > Composition. From there, you can toggle Grid on to help align your composition and toggle the Level tool on to keep horizons straight. Both are especially useful for architectural images, landscapes, and any frame where precise alignment matters.
Quick Access
Add Capture to your Lock Screen widget or assign it to your Action button for instant access. On iOS 26, you can map the camera button directly to VSCO Capture.
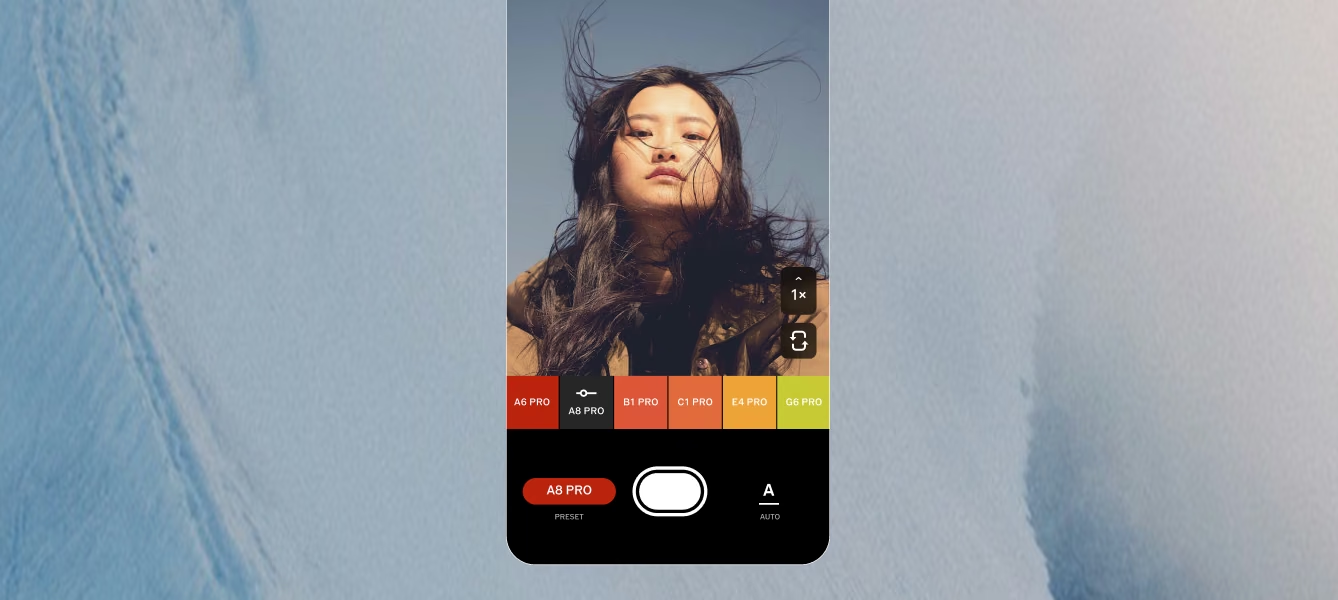
Live presets are at the center of the Capture experience.
To apply a preset:
- Open VSCO Capture
- Tap the preset button to explore your available presets. Tap any preset to apply it live, tap it again to adjust Strength.
- Press the shutter to capture the image
Enabling Save of Both Versions
If you want the option to change the preset later, enable the save both original and edited setting in Camera Settings. Capture will save both the preset-applied version and a clean original.
How Presets Change Composition
When you apply a preset and see the color treatment live, it changes what you notice in the scene.
A cooler, more desaturated preset draws attention to tonal contrast and geometry. A warm, filmic preset makes golden-hour light and organic textures more visible.
Use the live preview not just to pick a look, but as a compositional tool. It tells you what in the frame works and what doesn't before you decide to press the shutter.
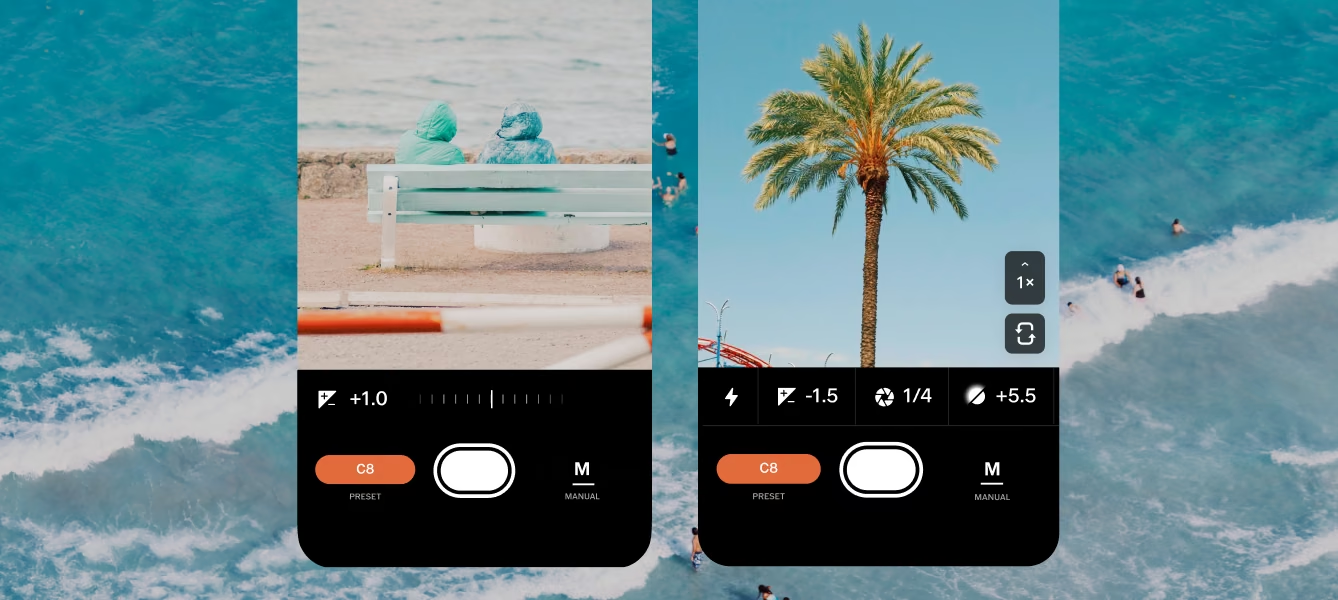
Manual controls in Capture are photo-only. Switch to Manual mode with the A/M toggle, and the controls appear as dials that respond in real time.
Flash On, off, auto, or flashlight mode for continuous light. Useful for fill flash in harsh midday sun or for the deliberate pop-of-flash look with a fast shutter speed.
Exposure Fine-tune overall brightness independently of ISO or shutter speed. Use it when the metered reading is too bright or too dark for the effect you're after. You can also adjust exposure by tapping to focus and sliding up or down on the viewfinder. No need to switch to Manual for this control.
Shutter Speed Faster speeds freeze motion. Slower speeds introduce blur, useful for light trails, moving water, or ambient night scenes. Slow shutter on a phone requires a steady hand or a mount.
ISO Controls the sensor's sensitivity to light. Lower ISO gives cleaner images in bright conditions. Higher ISO brightens scenes in low light at the cost of more noise. A film aesthetic actually benefits from some grain at higher ISO. Let it work with the Grain effect rather than against it.
White Balance Adjust how the camera renders color temperature. Correct artificial light color casts (tungsten, fluorescent) or push the color creatively: cooler for a colder mood, warmer for a golden-hour quality in any light condition.
Tap-to-Focus
Tap anywhere on the viewfinder to set focus on that point. Slide up or down from the same tap to adjust exposure. Capture also includes automatic macro mode that activates when the camera is close to a subject.
Tap the format indicator at the top center of the camera interface to switch formats.
HEIC High efficiency with smaller file sizes and good quality. The default for everyday photography. Best for everyday use when compatibility isn't a concern.
JPEG Universally compatible, easy to share. Use when you need broad compatibility, for clients, print labs, or platforms that don't support HEIC.
RAW Minimally processed sensor data preserved with maximum detail. Larger files, more work in post, but maximum latitude for editing in Lightroom, Capture One, or any professional editor. Available at 12MP and 48MP depending on your iPhone model.
ProRAW Combines RAW's editing flexibility with Apple's computational image processing (better subject separation, improved low-light handling) while maintaining RAW editability. Available on supported iPhone models. Most photographers doing professional desktop editing will use standard RAW. ProRAW is worth trying when you want Apple's processing involved in the base file.
12MP vs. 48MP 12MP suits everyday use, smaller storage footprint, faster workflow. 48MP provides higher detail for significant cropping or large prints. Both 12MP and 48MP support RAW and ProRAW on capable devices.
What Happens to Your Capture Look in RAW
When capturing in RAW with a preset applied, Capture saves two files: the minimally processed RAW file (without edits) and a separate JPEG with your preset and effects baked in.
The RAW file is always clean. Edits cannot be saved back to the RAW format. To keep a version with your Capture preset, use the JPEG.
The RAW file goes to your desktop editing workflow, with the JPEG as a reference for the intended look.
Grain, Bloom, and Halation are available for photos only. They're applied live in the viewfinder, alongside other Manual mode tools.
They simulate physical phenomena from analog film, not filters overlaid on top, but behaviors that interact with the light and tone already in the frame.
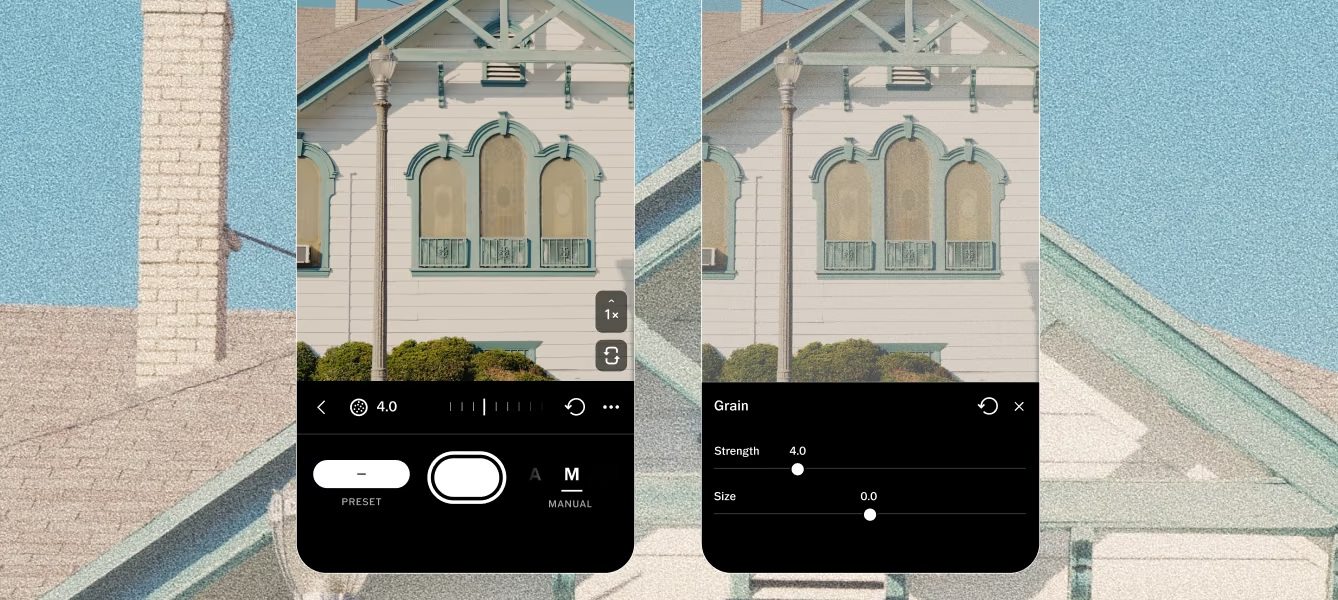
Grain
Adds analog film texture in real time. Three controls:
- Strength: How prominent the grain is
- Size: How coarse or fine the grain particles appear
- Color: Whether the grain leans warm, cool, or neutral
Grain is most convincing when it supports a scene that already has film character: a preset that pulls color in a filmic direction, slightly pushed exposure, or light that doesn't look perfectly controlled.
Applied to a flat, evenly lit digital-looking photo, it mostly just looks like added noise.
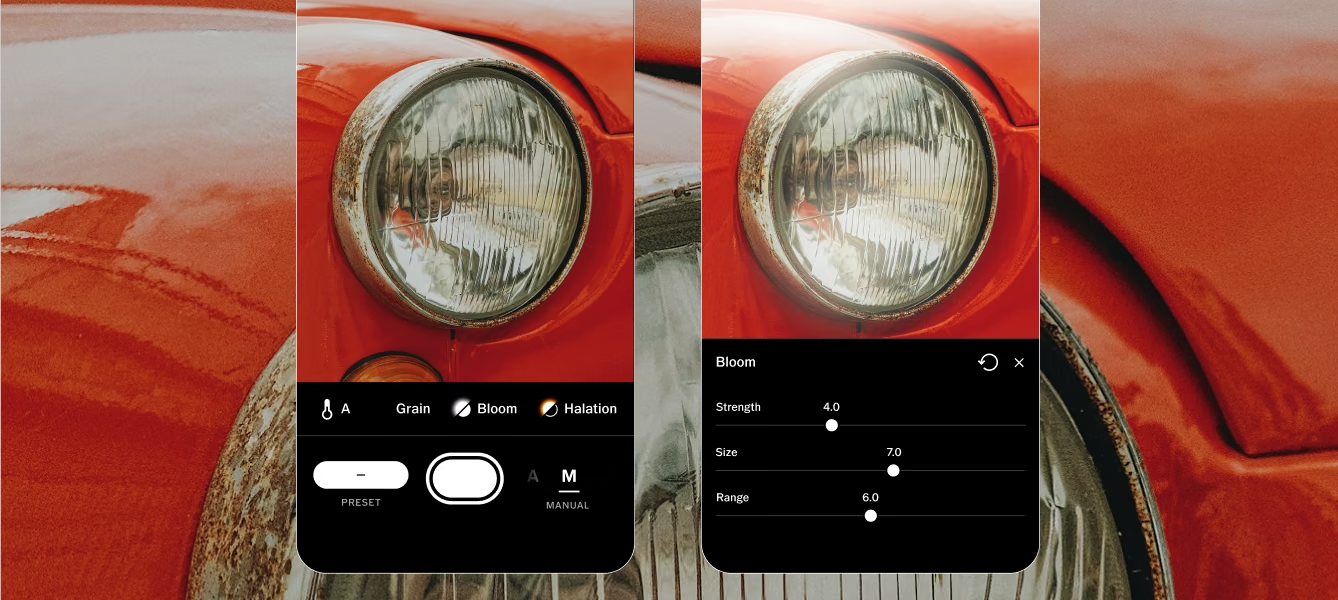
Bloom
Bloom adds a soft glowing halo around the brightest parts of the image, mimicking the light spill that occurs in classic film photography.
Controls: Strength, Size, and Range.
Best situations for Bloom:
- Bright, sunny outdoor conditions with strong highlights
- Scenes with reflective surfaces: water, glass, metal
- Portraits with soft, diffused light for a dreamy quality
- Foliage and natural environments with dappled light
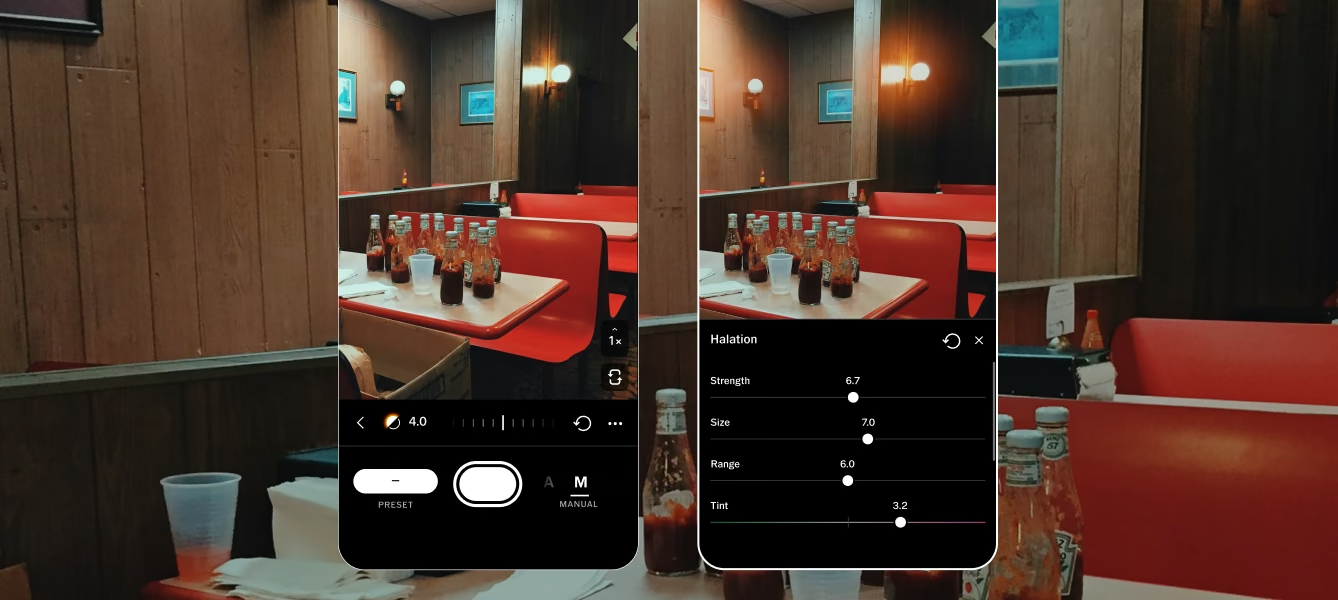
Halation
Halation simulates the reddish-orange glow that appears around highlights in some film stocks, caused by light bouncing off the film base before exposure.
It gives images a distinctly cinematic analog character.
Best situations for Halation:
- Strong directional light sources: street lights, backlit windows, neon signs
- Night scenes with point light sources
- Pairs well with Bloom for a full vintage analog look. Use both subtly for the most convincing result
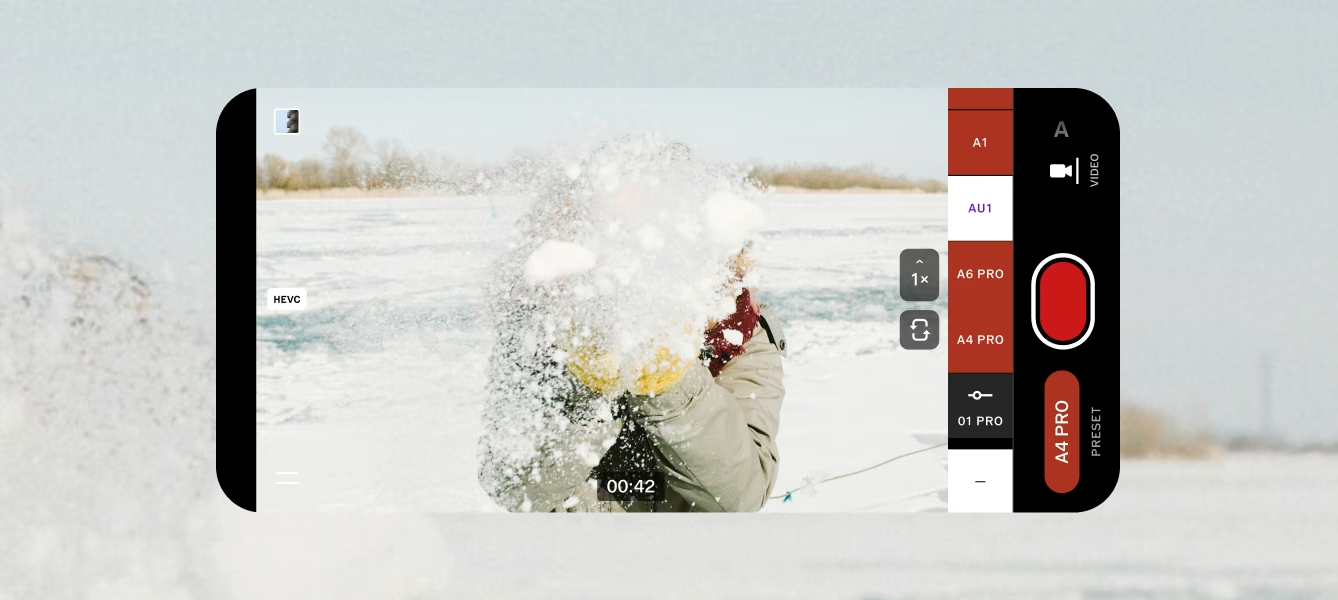
Capture supports video recording with live presets applied in real time, so the aesthetic you use for stills carries directly into motion without any additional steps.
To record video, switch to video mode at the bottom of the main viewfinder interface.
Select your preset. Tap the shutter button to start and stop recording.
What works in video:
- All 50+ live presets with real-time preview
- Same consistent look across stills and video from a single session
What is not available in video (photo only):
- Grain, Bloom, and Halation film effects
- Manual controls (exposure, shutter speed, ISO, white balance)
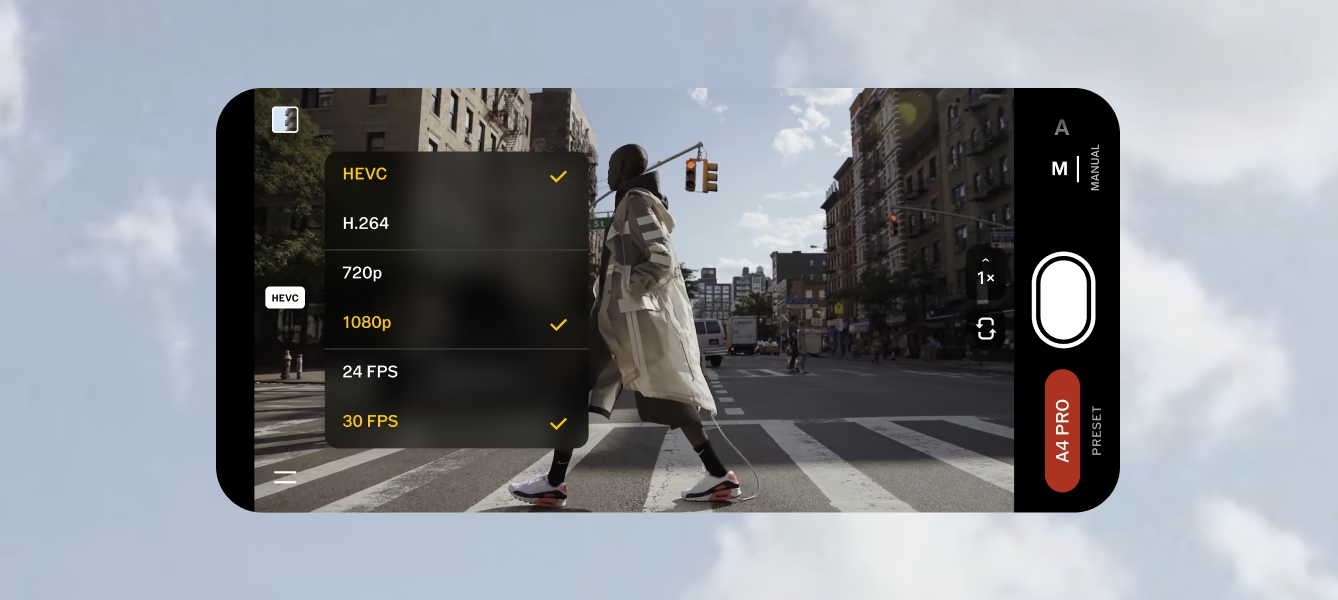
Video specs:
- Resolution: 1080p and 720p
- Frame rates: 24fps and 30fps
- Formats: HEVC (H.265) and H.264
Which codec to choose: HEVC produces smaller file sizes at the same quality. Use it when storage matters and you're editing in software that supports it (Final Cut Pro, Premiere, DaVinci). H.264 has broader compatibility. Use it when you're delivering to clients or platforms where HEVC support isn't confirmed.
Which frame rate to choose: 24fps has a film-like quality, with slightly more motion blur between frames, the look most associated with cinema. 30fps is smoother and more natural, better for documentary or social content. Neither is objectively better; choose based on the aesthetic you're after.
In-App Gallery
Photos and videos taken in Capture save to a dedicated in-app gallery. Review your images, delete misfires, and choose what to send forward from here.
Save to iPhone Photos Library
By default, photos may also save to your iPhone's native Photos library depending on your settings.
To adjust this: tap the hamburger menu at the top left, go to Camera Settings, and enable or disable the save-to-Photos-library option.
Send to the VSCO App
To send a photo from Capture to VSCO:
- Select the photo in the Capture gallery
- Tap the Edit image icon
- The image opens in the VSCO app editor with your Capture preset intact as a starting point
From there, access the full VSCO editing suite: 200+ presets, manual controls, AI Lab tools (Remove, Dehaze, Denoise, Upscale, Hairstyle, Restore), and more.
Post Directly to Your VSCO Profile
To post to your VSCO Profile from Capture:
- Select the photo in the Capture gallery
- Tap the Post to VSCO icon
- Add a caption or hashtags. Tap Save & Post.
Capture is most rewarding when you slow down slightly and make a few deliberate decisions before pressing the shutter. These principles help.
Choose the Look First, Then Compose
Apply your preset before you look for the frame.
The color treatment changes what you notice in the scene. A cooler preset draws attention to contrast and geometry; a warmer one pulls the eye toward texture and organic light.
Let the preset tell you what in the frame is worth capturing before you decide to commit.
Expose for What Matters
Your camera's auto exposure averages the whole scene.
In a portrait, expose for the face and let the background land where it does.
In a street scene, expose for your subject rather than the overall environment.
Tap to focus, then slide up or down to override the meter before pressing the shutter.
Use Film Effects Subtly
Bloom and Halation are most convincing when they support light that's already in the frame.
Bloom applied when bright highlights actually exist reads as natural. Applied to a flat, evenly lit scene, it just looks added.
The same goes for Halation: a touch of warmth around a strong light source is compelling; a lot of it in every frame starts to feel like an effect rather than a property of the image.
Is VSCO Capture free?
Yes. Capture is included with VSCO's free Starter membership, which gives you live presets, manual controls, and film effects with no trial period, credit card, or expiration date. Paid memberships expand the same tools with more presets, advanced editing and AI tools, additional storage, and professional features for photographers working with clients.
Is VSCO Capture available on Android?
No. Capture is currently iPhone only.
Do I need a VSCO account?
Yes. A VSCO account is required to use Capture.
What iPhone is required?
iOS 16.6 or later. RAW, ProRAW, and 48MP require supported iPhone models. Check Apple's documentation for your specific device.
Can I use VSCO presets while taking photos?
Yes. All 50+ presets apply live in the viewfinder as you compose, for both photos and video.
Can I see VSCO presets before I take a photo?
Yes. The preset is displayed live in the viewfinder. You see the result before you commit to the frame, and can adjust intensity with the strength slider in real time.
Can I use Bloom, Halation, and Grain on video?
No. Film effects are available for photos only. Video supports live presets but not Bloom, Halation, Grain, or manual controls.
Can I use manual controls in video mode?
No. Manual controls (exposure, shutter speed, ISO, white balance) are available for photos only.
Can I capture in RAW with VSCO Capture?
Yes. RAW and ProRAW are supported on compatible iPhone models at both 12MP and 48MP.
Does capturing in RAW lose my preset?
No. When capturing in RAW, Capture saves two files: a clean RAW file and a separate JPEG with your preset and effects applied. The preset look is preserved in the JPEG. Edit the RAW file on desktop; use the JPEG as your visual reference.
What manual camera controls are available?
Flash (on/off/auto/flashlight), Exposure, Shutter Speed, ISO, White Balance. Switch to Manual mode with the A/M toggle at the bottom right.
Where are my Capture photos stored?
In the Capture in-app gallery. To also save to your iPhone's Photos library, go to the hamburger menu, tap Camera Settings, and enable the save option.
Can I edit Capture photos in the VSCO app?
Yes. Tap the VSCO icon from any photo in the Capture gallery to open it in the VSCO editor with your preset intact.
What's the difference between VSCO Capture and the iPhone Camera app?
Capture gives you live VSCO presets, film effects (Grain, Bloom, Halation), and manual controls that you apply as you compose. The iPhone Camera applies computational processing automatically and lets you style images afterward. If you want to decide how the image should look before you press the shutter, Capture is the right tool.
What's the difference between VSCO Capture and the VSCO app?
Capture is a camera. The VSCO app is an editor. Capture shapes images at the point of capture; the VSCO app refines them afterward. Photos taken in Capture move directly into the VSCO app for further editing with one tap.
Does VSCO Capture work with the iPhone Camera Control button?
On iOS 26, the camera button can be mapped to third-party apps including VSCO Capture.
Try photographing the same scene with your iPhone’s Camera app and VSCO Capture.
With one, you decide how the image should look after you take it.
With the other, you make those creative decisions while you’re still composing.