
If your photo looks too bright or washed out, you're likely dealing with overexposure. Overexposed photos often lose contrast, color accuracy, and highlight detail, making them harder to match to your original creative vision. Whether it’s a misjudged lighting condition or a camera setting that went too far, a photo editor like VSCO can fix your overexposed photos and help you edit for darker images.
In this guide, you’ll learn how to darken an image using tools you can find in your preferred photo editor or the VSCO photo editing app, correct exposure imbalances, and get your picture looking closer to how you originally envisioned it. We’ll cover common overexposure tools like Exposure and Tone, targeted adjustments, and photo filters that can help recover and improve the look of overexposed photos.
What’s in this guide:
- What is overexposure and what causes it?
- Can you fix overexposed photos?
- Avoiding overexposure
- How to fix overexposed pictures
- Pro photo editing tips for better results
- Using photo filters to fix overexposure
- Mistakes to avoid
- Fixing overexposed videos
What is Overexposure in Photography?
Overexposure happens when a photo receives too much light, resulting in overly bright areas that lack detail. This usually affects highlights and can flatten the dynamic range of your image, creating a washed out feel. Common subjects that often fall victim to overexposure include bright skies, pale clothing, and light skin tones.
Visual signs of an overexposed photo
An overexposed photo typically shows several visual signs. You might notice blown-out highlights or areas that appear completely white with no recoverable detail. Colors often look washed out, lacking the richness or depth you saw in real life. The overall contrast tends to be low, making the image feel flat or hazy.
Common causes of overexposed photography
Overexposed photos often result from a few common shooting conditions. Harsh direct sunlight can overwhelm your camera’s sensor, especially during midday or without shade. High ISO settings in bright environments can also contribute to excessive brightness, amplifying light unnecessarily. Long exposure times, particularly in well-lit scenes, may let in too much light and blow out details. Lastly, incorrect camera metering or auto-exposure settings can misjudge the scene, leading to unintended overexposure.
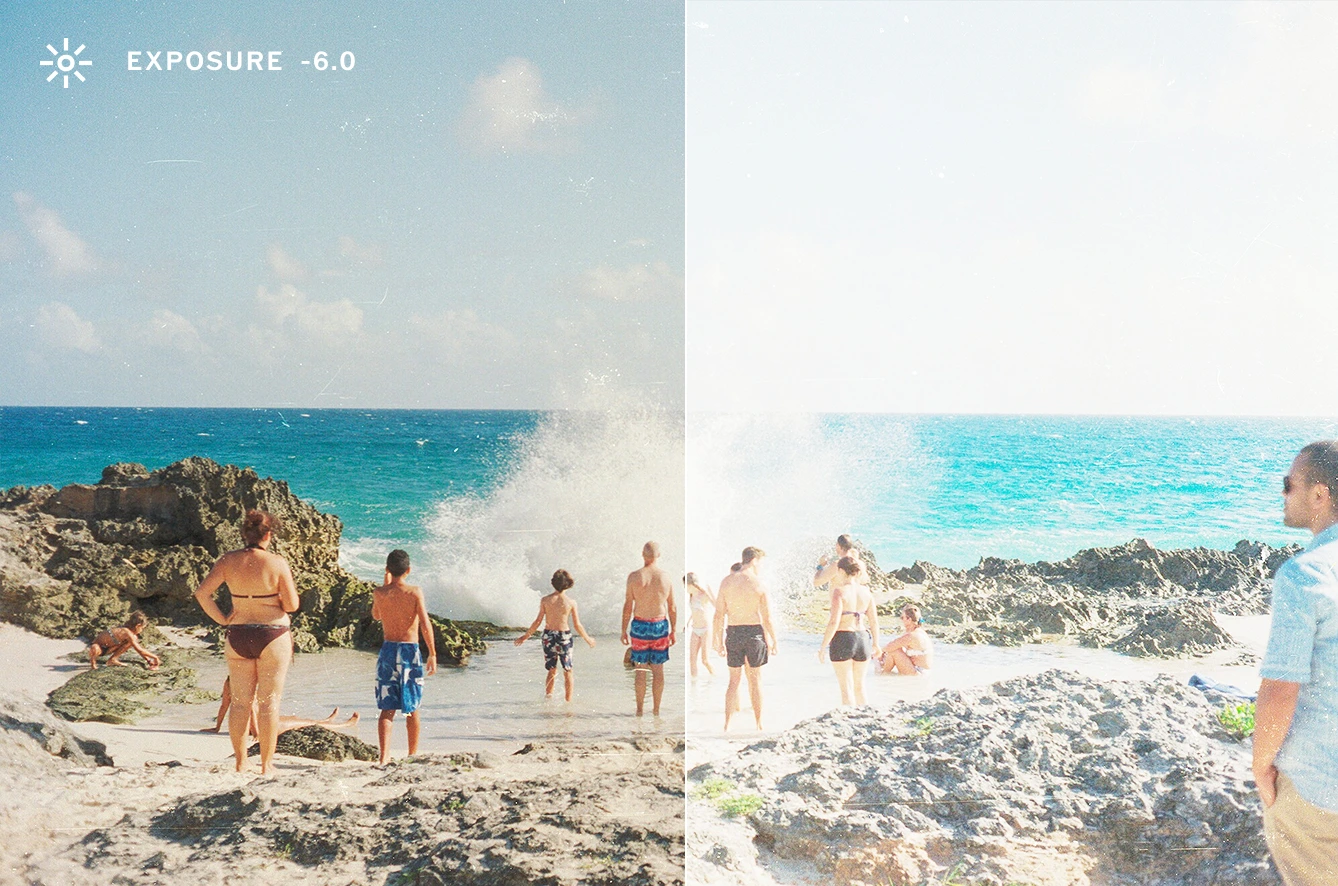
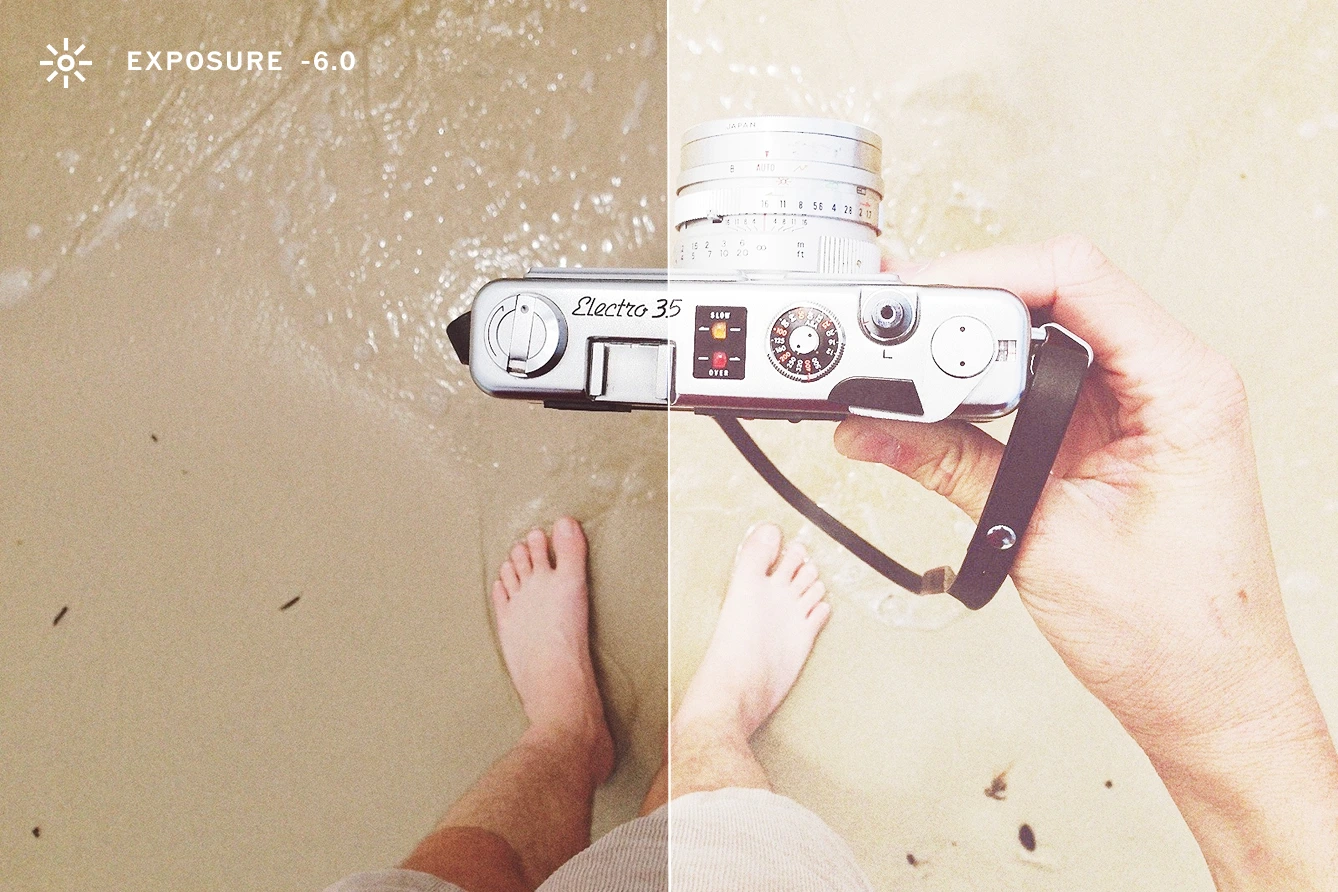
Check out this video made by photographer Zach Hodges showing under and overexposure with film pictures. Although film has distinct qualities when compared to digital, you can still see what happens when an image is both overexposed or underexposed, and how it compares to an iPhone photo of the same scene.
Not to be confused with high-key photography
High-key images are bright by design, often using soft lighting and minimal contrast to create a clean, airy aesthetic. They maintain detail and tonal control, even in the highlights. Overexposure, on the other hand, is usually unintentional and results in lost detail, especially in the brightest areas.
That said, if you're struggling to fully recover an overexposed photo, consider leaning into the look instead of fighting it. With careful photo editing, you can repurpose an overexposed photo into a high-key style by maintaining the bright mood while bringing back just enough tonal structure to make it intentional. Turn a technical mistake into a creative decision by adjusting contrast, balancing your whites and shadows, and fine-tuning the image to get an intentional high-key photo. More on all those tools further below.
Can You Fix an Overexposed Photo?
Yes, you can fix an overexposed photo, especially if it was shot in RAW format. RAW files retain much more image data, particularly in the highlights and shadows, giving you greater flexibility and control during editing. JPEGs and the popular HEIF file format on iPhones, on the other hand, are more compressed and may be harder to correct, though minor exposure adjustments are still possible.
A helpful way to assess exposure is by using the histogram: if the graph is pushed heavily to the right, it likely indicates overexposure. In the VSCO photo editor, Pro Members can easily access the histogram of any image in the top right corner of the photo editor. Clipped highlights, where the histogram spikes at the far right edge, mean some information is lost and may not be recoverable. Even so, photo editing tools can help recover usable detail and rebalance the image to better reflect your creative intent.
Best Practices to Avoid Overexposure
Before diving into editing, it’s worth taking steps to prevent photo overexposure directly in-camera. As mentioned, shooting in RAW gives you more flexibility in post-processing, preserving highlight and shadow detail that JPEGs can lose. Exposure bracketing is another useful technique. To do this, simply capture multiple versions of the same scene at different exposure levels, so you have options later. And in bright conditions, be sure to lower your ISO and use faster shutter speeds to control the amount of light hitting your sensor.
For even more in the moment control, consider using VSCO Capture, our intuitive camera app designed with photographers in mind. It combines precise manual controls with live previews of VSCO’s iconic film-inspired presets. This means you can adjust your settings and aesthetic as you shoot, helping prevent overexposure while crafting the exact look you want before you even hit the shutter.

How to Fix Overexposed Pictures
Photo editors like VSCO make it easy to darken an image and fine-tune exposure settings. You can brighten and darken images with an exposure editor, as well as edit with other photo tools, filters, and effects.
Here’s a step-by-step approach you can take to fix your overexposed photos. Use your preferred photo editor to find these tools or you can follow along using the VSCO app or online desktop editor.
1. Import Your Photo
Select the picture you want to edit and bring it into your chosen photo editor to get started.
In the VSCO app, you can tap the ‘+’ icon to import your image. Tap it again and open the editor using the ‘Edit Image’ icon in the bottom navigation.
2. Use the Exposure Editor
Start by correcting the overall brightness of your image.
- Find and select the Exposure editor from the tools menu.
- Move the slider left to make the image darker.
- Start with small adjustments (-0.5 to -2.0) and increase gradually.
3. Adjust Highlights and Shadows with Image Tone Edits
Use a Tone editor to fine-tune the tonal range and recover detail where you need it most.
- Lower Highlights to reduce brightness in the most overexposed areas.
- Raise Shadows slightly to bring back balance without making the image look flat.
4. Add or Refine Photo Contrast
Bring back separation between light and dark areas by adjusting image contrast.
- Use a Contrast editor to restore definition.
- Don’t go too far or you’ll lose subtle transitions in tone.
5. Target Specific Areas with Dodge & Burn
Use localized brush adjustments when only part of the image is overexposed.
- In a photo editor, select the Dodge & Burn brush to make localized adjustments.
- Use it to darken only overexposed areas like skies or bright clothing.
6. Adjust Temperature and Tint with White Balance
Correct any color shifts caused by overexposure with a White Balance editor.
- If overexposure caused color shifting, use Temperature (cool to warm) and Tint (green to magenta) sliders to correct it.
- Slight tweaks can make a big difference in skin tone and overall color accuracy.
7. Fine-Tune with Split Tone and HSL
Recover color and tone in specific ranges to better match your vision.
- Split Tone can be used to reintroduce warmth or coolness to highlights and shadows with colored tints.
- Hue, Saturation, and Lightness, or HSL, sliders can target and fix specific color ranges like green leaves and blue skies.
8. Sharpen and Clarity
Enhance perceived detail without overprocessing. Use these sparingly to avoid unwanted digital artifacts or noise.
- An image sharpener improves fine detail and edge definition.
- Photo Clarity is best for enhancing larger details and texture.
9. Add Style with Bloom, Halation, and Grain Effects
If recovery isn’t perfect, use photo effects to unify and elevate the highlights in your image.
- Apply a Bloom effect to introduce a soft glow in bright areas, making overexposure feel intentional and atmospheric.
- Use a Halation effect to add warm cinematic color around highlights, giving visual depth and character to the image.
- Add a Grain filter to soften overly digital sharpness and bring a textured, film-like quality that helps blend clipped areas into the overall aesthetic.

Pro Photo Editing Tips for Better Results
In what order should you edit photos? Layer adjustments intentionally
Begin with basic exposure corrections, then adjust highlights and shadows to restore balance, and finish with any necessary fine-tuning. Working in this order helps each edit build cleanly on the last. If the photo already feels right after those initial steps, don’t overdo it. The most effective edits are often the simplest.
Zoom in while editing
Pinch to zoom in and check your image in more detail, especially in critical areas like skin, sky, and fine textures. Overexposure might not be obvious until you're close up.
Convert photos to black and white
If detail is completely blown out and can't be recovered, switching to black and white can turn a technical issue into a stylistic choice. High contrast black and white can be especially effective in saving overexposed shots. Try popular black and white photo filters like B1 and B5.
Use film photo effects creatively
Adding grain can bring depth back into flat, overly bright areas. It also introduces a film-like quality that helps unify uneven or clipped tones. Other film effects like frame overlays, lens flares, light leaks, and distressing can help unify, or even cover up, overexposed areas.

Lean into a high-key look
When recovery fails, reframe the photo as an intentional high-key image. Bright, low-contrast photos can feel clean and modern with the right approach and adjustments.
Filters for Overexposed Photos
Photo filters like VSCO’s can be especially helpful when working with overexposed photos, offering a quick way to rebalance light, tone, and color in one tap.
VSCO's G3 filter enhances vibrant colors and increases contrast, making it a strong choice for portraits that need depth and dimension.
For a more dramatic approach, B4 is a high-contrast black and white photo filter that transforms blown-out highlights into bold visual elements.
If you’re leaning toward a more muted or atmospheric look, the M3 photo filter adds a subtle fade with warm brown and green tones, ideal for creating mood when correcting overexposure.
Mistakes to Avoid When Editing Overexposed Photos
When editing overexposed photos, it's easy to go too far. Avoid over-correcting, pulling the exposure or highlights down too aggressively can crush shadows and make the image look flat or unnatural.
If you’re printing or sharing, make sure to calibrate your screen and view your edits on multiple devices to catch any tonal imbalances you might miss on a single display.
Be careful with tools like Sharpen or Clarity, when used in excess they can introduce unwanted artifacts or make the image look overly processed.
Lastly, don’t forget your creative intent: every adjustment should support the mood or story you're trying to convey, not just fix technical issues.
Can You Fix Overexposed Video?
VSCO’s video editor uses the same intuitive workflow as photo editing, so you can apply similar techniques to correct overexposed videos. While video files don’t have the same dynamic range as RAW photos, thoughtful edits can still make a big difference.
Plus, film filters and video effects are available to be applied to videos, giving your edits a cohesive look and helping to stylize any overexposed areas.
Editing Overexposed Images
Overexposed photos aren’t unusable, you just need the right tools to rebalance the image. With the VSCO app, you can darken an image, recover highlights, and match the photo more closely to what you saw or imagined.
Whether it’s a creative shoot in bright sun or a casual moment that needs correction, exposure issues can be fixed with precision. Experiment with the tools, keep learning, and refine your process every time you shoot.
Download the free VSCO app and become a Pro Member to start editing overexposed photos with more control and confidence.