Analog film has been growing in popularity for quite a few years as more people discover the magic of the film experience, and the beautiful vintage aesthetic that it has.
Film is a truly unique experience that every serious photographer should try at least once — it really is wonderful. However, it can be a very expensive hobby, leading many to look for ways to make their digital images look more like film. Thankfully, there is a lot you can do to get your digital images closer to the look of film!
The film look is usually a combination of the color tonality and the grain texture film imparts on its images. The end result is often a sort of “glorified reality” that simultaneously looks natural and yet nostalgic, clean and yet full of character.
Blues often turn a bit more cyan, greens cool off and become more striking against warm tones that are gently nudged towards complementary reds and oranges. The grain adds a subtle texture that combines with the detail in the image to create both a softness and a perception of more detail.
It’s really a special look, and it’s no surprise that so many people are now gravitating towards this aesthetic.
Film Emulation with VSCO
I’ve been at VSCO for nearly 14 years now, helping people make their photos look like film. I built the VSCO Film presets back in the early days, and then later I led a project to take film emulation as far as we could go across 4 years.
We hired a color scientist, built a lab, bought all kinds of rare and expensive equipment, and ultimately created a very advanced process that you see as the Film X Presets in the VSCO app.
So, in this 3-part series, I’ll be using these presets to show you how to go about this because these are really my passion-project, and I think the results speak for themselves.
First, we’ll look at getting the color tonality of film with the Film X Presets, exploring various film types as well as film exposure and scanner white balance.
Next, we’ll look at getting the texture of film with the Grain and Film (FX) Effects, exploring how ISO affects grain size, and looking at the difference between color and black & white grain.
Finally, we’ll go over some tips and tricks to put the finishing touches on your film look by exploring blur, vignetting, HSL, dodge & burn, bloom, and halation for some extra realism.
In this guide:

<h2 id="anchor">Film recipes to get started</h2>
Of course, if you’re just looking for a quick start, you don’t need to read all of that! Here’s a few film emulation recipes to get you started right away:
Film Filter: VSCO Preset AU5
- Strength: +12.0
- Character: 0.0
- Warmth: +1.5
Grain
- Strength: +6.0
- Size: 0.0
- Color: +2.5
Vignette
- Strength: +4.0
Film Filter: VSCO Preset KE1
- Strength: +12.0
- Character: +3.0
- Warmth: +3.0
Grain
- Strength: +6.0
- Size: 0.0
- Color: +2.5
Vignette
- Strength: +4.0
With VSCO Recipes, you can also save these film recipes to use again or batch edit multiple photos. Explore more film photo filters available on the VSCO app.
The Color of the Film Aesthetic
In the digital age, we can create near-perfect, color-accurate replications of reality in ways that film engineers could only dream of. Despite that, people are flocking to analog film.
I would argue that much of the photography we make is an effort to create beauty, not to capture exact reality. We want to convey a feeling, an emotion through our images, and the color palette of film can be amazing for those needs.
Not only does it import some nostalgia from the past, but the colors in films are also the results of decades of work by the brilliant engineers of the past. It’s no accident that these looks are visually pleasing! The gentle tonality, subtle color harmony, and balanced saturation of so many films is a great starting point for nearly every kind of image.
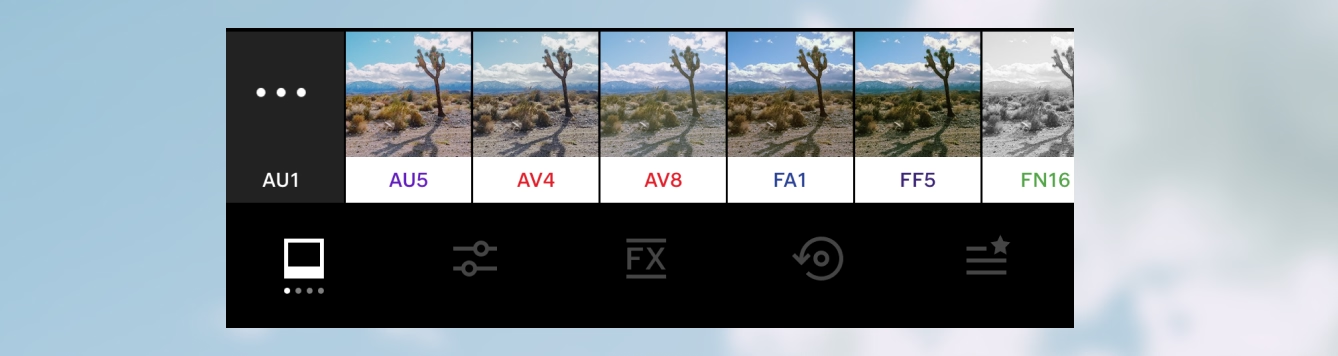
The film presets are the ones near the front with the white background and colored labels in the VSCO app. The names are actually very significant, and let’s look at AU5 as an example. If you tap into the preset, you can see that this film is inspired by Agfa Ultra 50, and that’s where the name comes from.
- A = Agfa (the company that made this film)
- U = Ultra (the model or band of this film)
- 5 = 50 (the speed, or ISO, of this film)
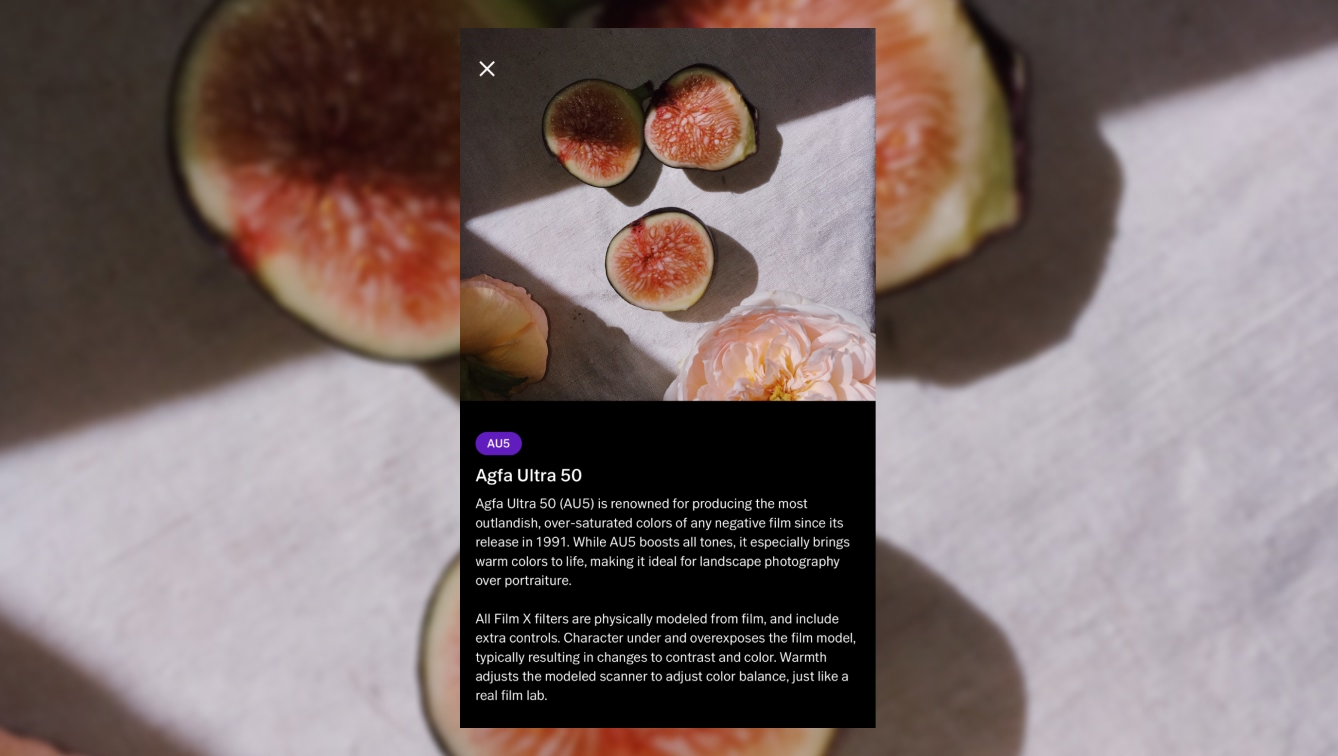
While you’re in this view, you can actually tap on the name and there’s a great write up about each film so there’s a lot more to learn there if you’d like.
The colors of the labels are also significant, being drawn from the box or the canister of each film. So, as you scroll through these, you can really get a sense of what you’re working with by the name of each film.
This list of 41 films is a sampling of many of the greatest hits from the peak of the film era, from consumer films like the KG series, pro films like the KP and FP series, positive films like KA and FV, black & white films like IH5, and rare films like the A series.
However, as you tap through them, it’s important to understand that a real film is not just one look, and neither are these presets, so let’s look at the controls you have with these presets.
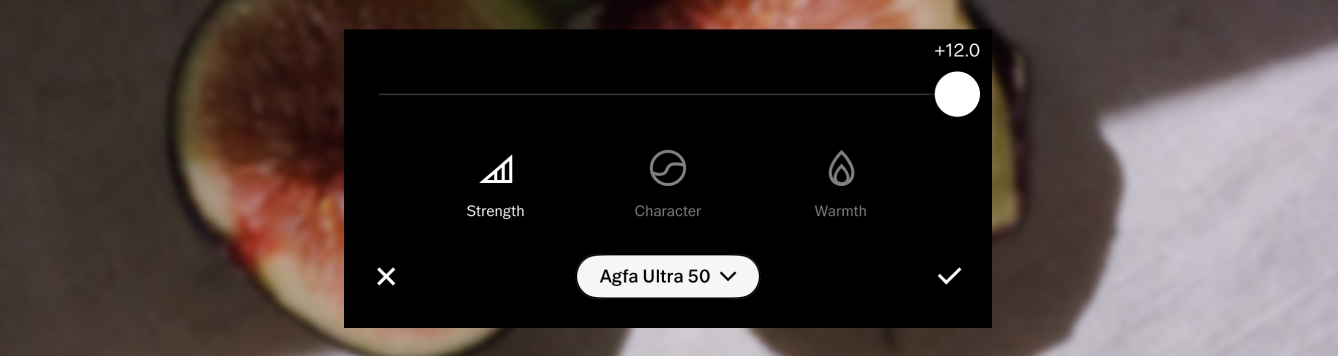
Strength
Strength controls the blend of the overall film look with the original image.
I’d actually suggest that you adjust this one last, since it’s easier to see what the other controls are doing when the Strength control is all the way up.
Also, this is a purely digital control, you can’t turn the effect of real film down, so if you’re going for realism, it makes sense to leave Strength all the way up.
Character
Character is the exposure of the film. If I were to overexpose the film by decreasing the shutter speed or the aperture from the metered reading, thereby letting more light hit the film, the image I would get from the lab would look a little different.
With real film, a bright outdoor shot might be overexposed, while a shot in a darker indoor scene might be underexposed, so you can get a more realistic look by applying character in scenarios this way.
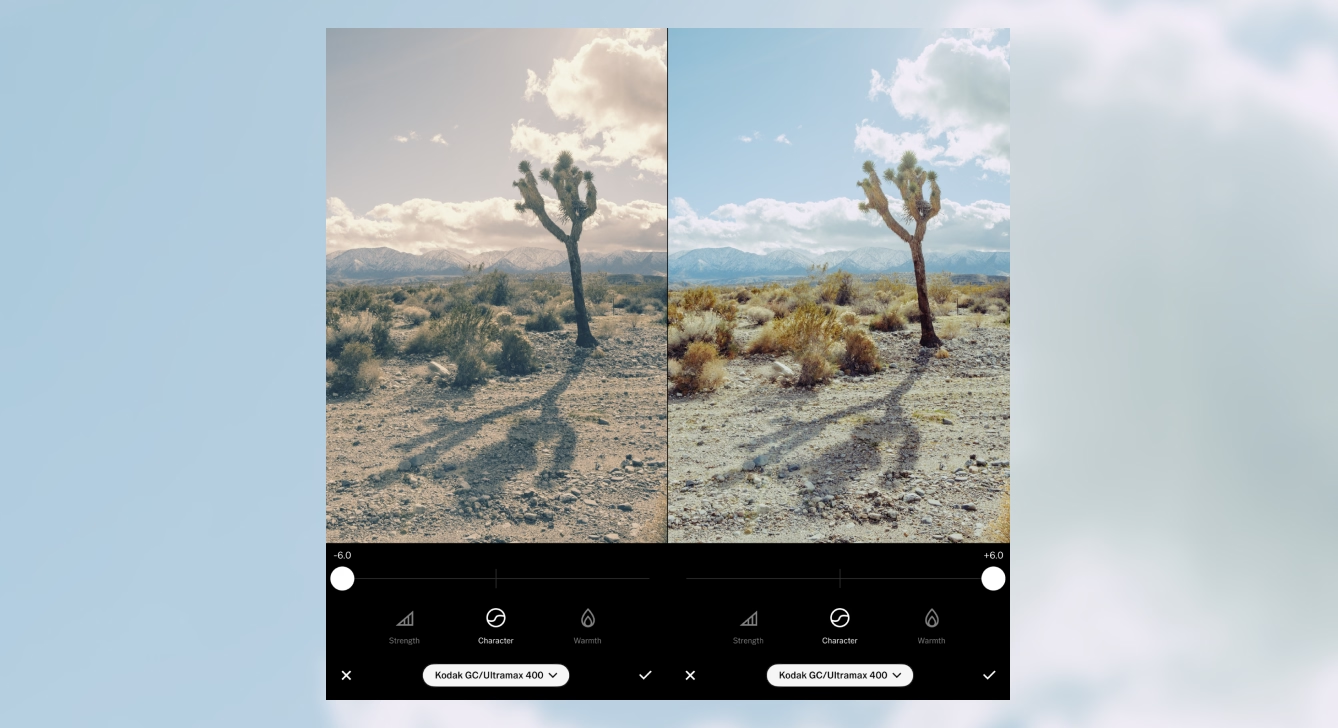
How to get an overexposed film look
On the character slider, overexposure is the positive direction to the right. Generally you’ll get more contrast and color when you go this way, and it often looks really nice.
How to make photo look like underexposed film
On the opposite end is underexposure, which you would get if you increased your shutter speed or aperture from the metered reading. This typically decreases contrast and color, even sometimes bringing in a fade to the shadows at the extreme end.
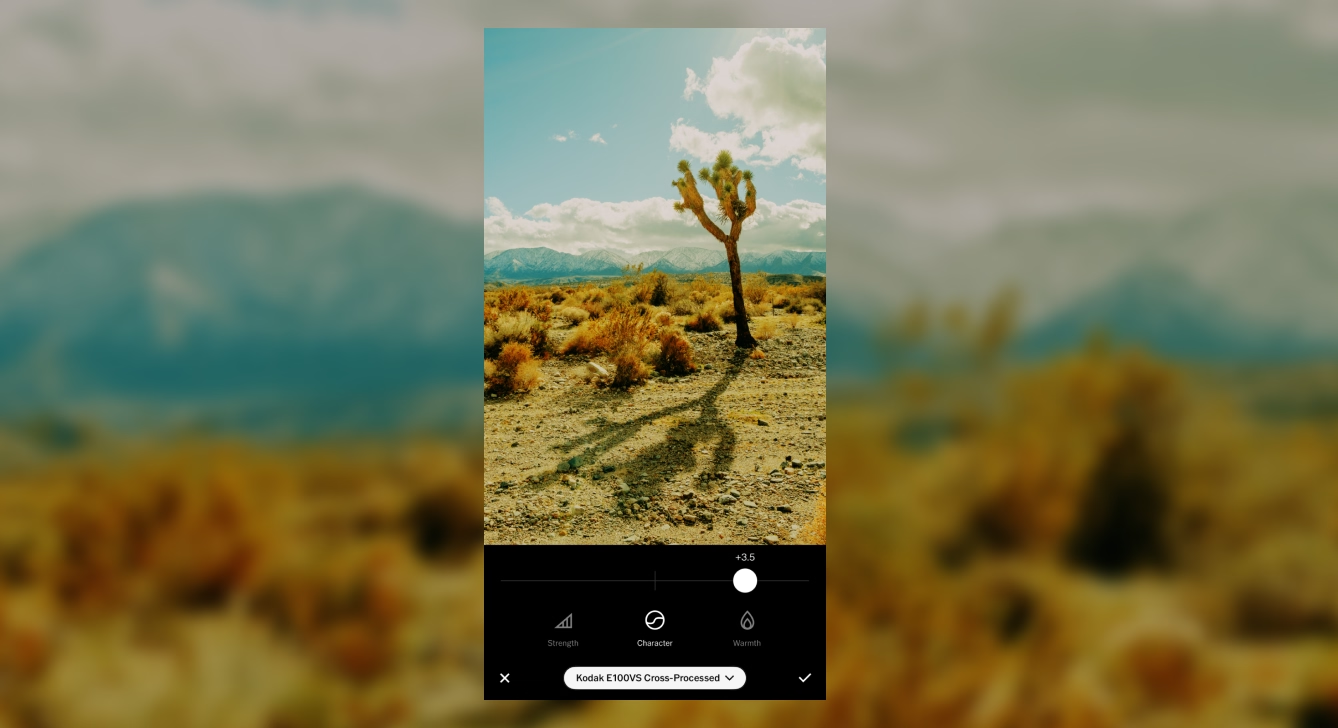
Cross-processed films
I’ll just point out too that the cross processed films - KA3X and FR4X - go wild on the character slider because of how strongly those films reacted to changes in exposure, it’s almost like having 4 or 5 different films on this slider.
But with most films, these changes are pretty subtle, so don’t be afraid to push it pretty far if it looks good to you.
Warmth
Warm simulates the color temperature adjustments in the scanner.
When you send your film to a lab to get processed and scanned, they are adjusting the white balance for each image in the scanner to try and make it look the best it can.
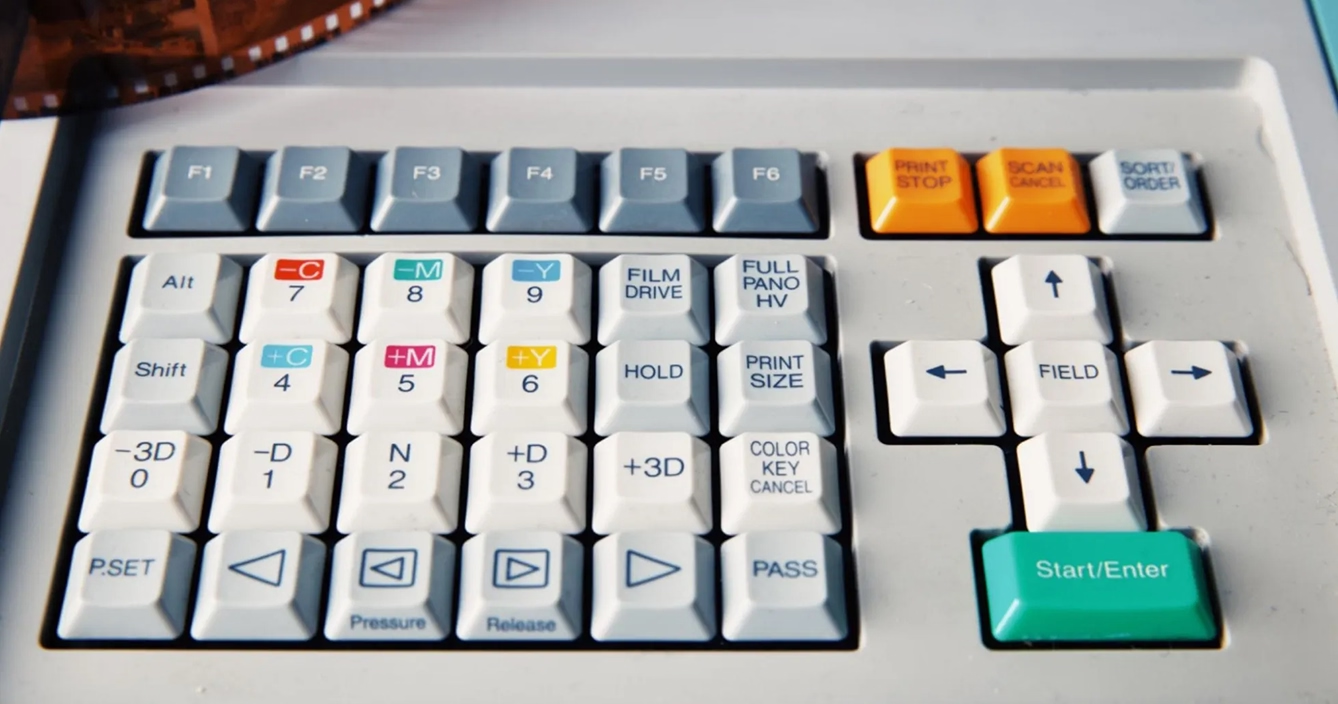
Here’s a picture of these controls on our Fuji Frontier scanner back in our lab, and you can see the CMY (Cyan, Magenta, Yellow) controls there for white balancing. With this tool you can add a warm or a cool tone to your image but in a way that is realistic to the film process.
For this image, I really like this warmer tone, it really suits this kind of desert feel.
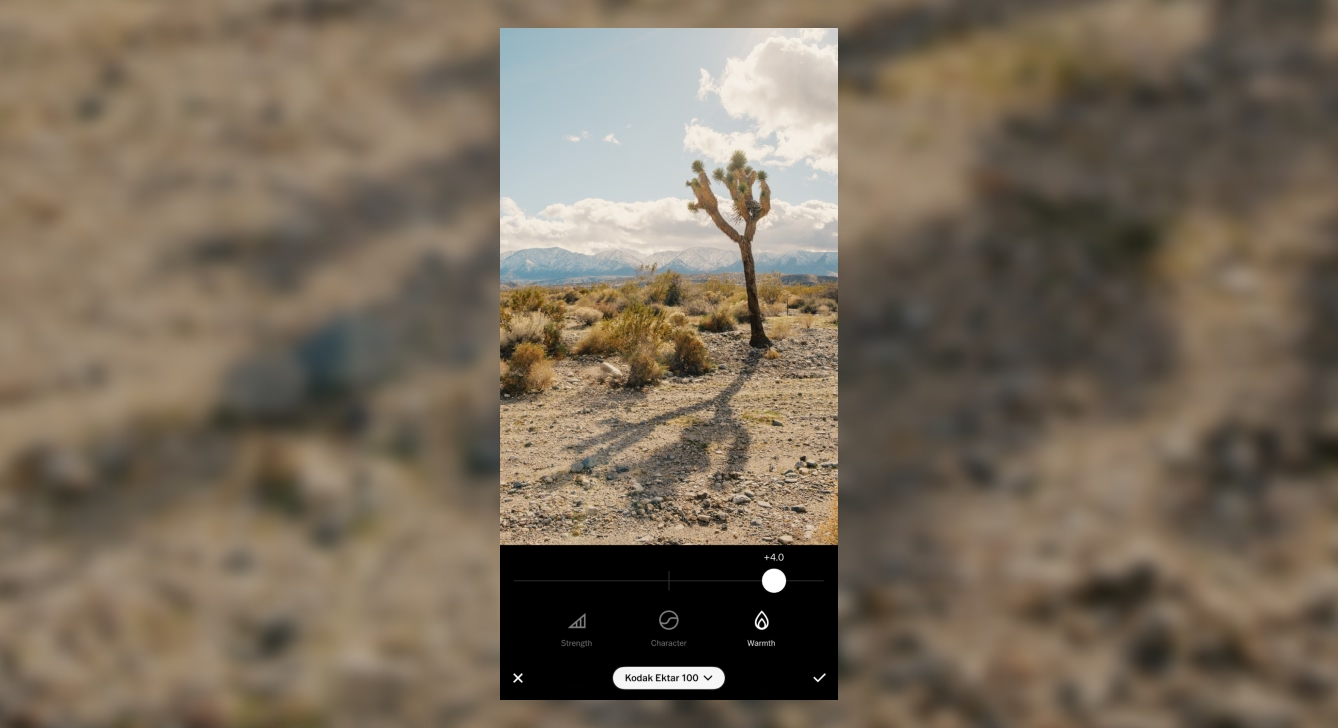
Changing film color and tonality
Now you know how to understand and apply the color and tonality of film to your digital images. A helpful practice at the end is to tap and hold to see a before and after. As you can see with these edits, the image now looks a lot more like film.
Up next, we’ll take a look at getting the texture of film with Grain and Film (FX) Effects.
Emulating the grain of film
Another important element of the film look is the texture and grain of film. This effect goes by many names, but it generally refers to the presence of a sort of noise texture that might look like static or dust in the image. This is an important part of the film look, and the VSCO app has a powerful suite of tools to recreate these textures, so let’s see how we can bring that element into our look.
Real film images are created with millions of microscopic silver-halide crystals suspended in gelatin. When they are exposed to light and then chemically processed to remove the unexposed crystals, the remaining particles form the image that we see in the film.
Black & White films just have one layer of these crystals, while color films have 3 layers.
More sensitive (higher ISO) films have larger crystals, which creates the appearance of stronger, more coarse grain, while less sensitive (lower ISO) films have smaller crystals and thus finer and more subtle grain.
A general rule of thumb is that a brighter scene will probably have less grain and a darker scene will have more.
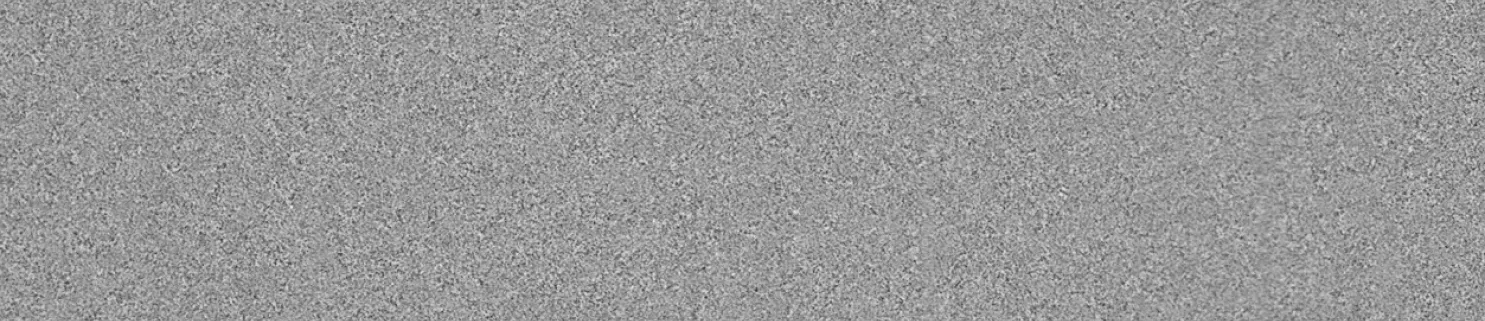
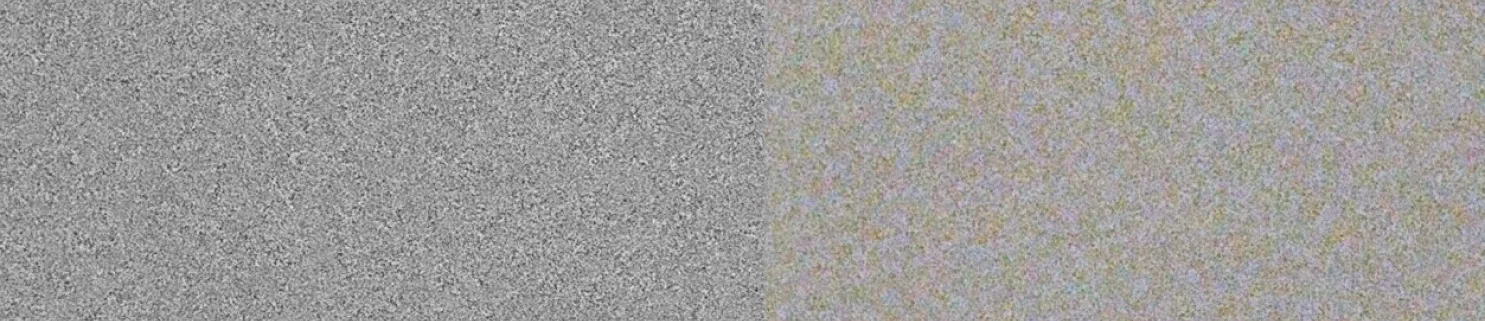

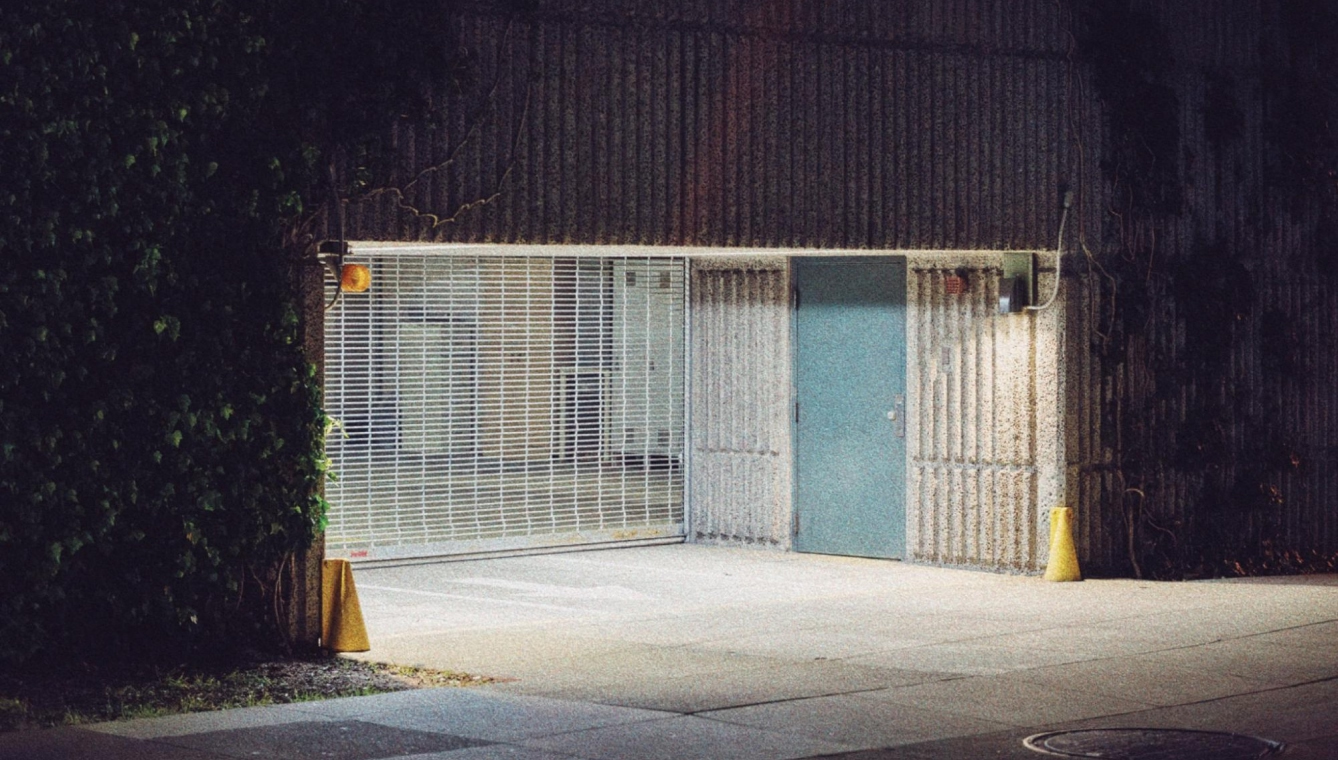
In the VSCO app, you can add and adjust film grain using the VSCO Grain tool.
Start by turning up the Strength control, and I’d suggest you begin by turning it up all the way. You probably won’t leave it there, but this is a great practice just to help you see what a tool is doing. It can also be helpful to see the extremes — you may realize you like it! You’d never know what it could look like if you’re being too subtle at the start.
Now with the Strength slider turned up all the way, you can really see the effect, but since it’s such a detailed effect, it can also be helpful to pinch to zoom in to see the grain more closely. Now that we’ve done that, let’s talk about the other 2 controls.
As we learned earlier, higher ISO films will have larger grain, so increasing the size can help you simulate that if you’re using a higher speed film like KP8 or KT32. (You may recall from the last article that the number refers to the speed of the film).
For a film like AU5 or KE1, those are lower speed films, so a lower ISO, and they’re going to have smaller grain, so you could reduce the size to simulate the look of those films.
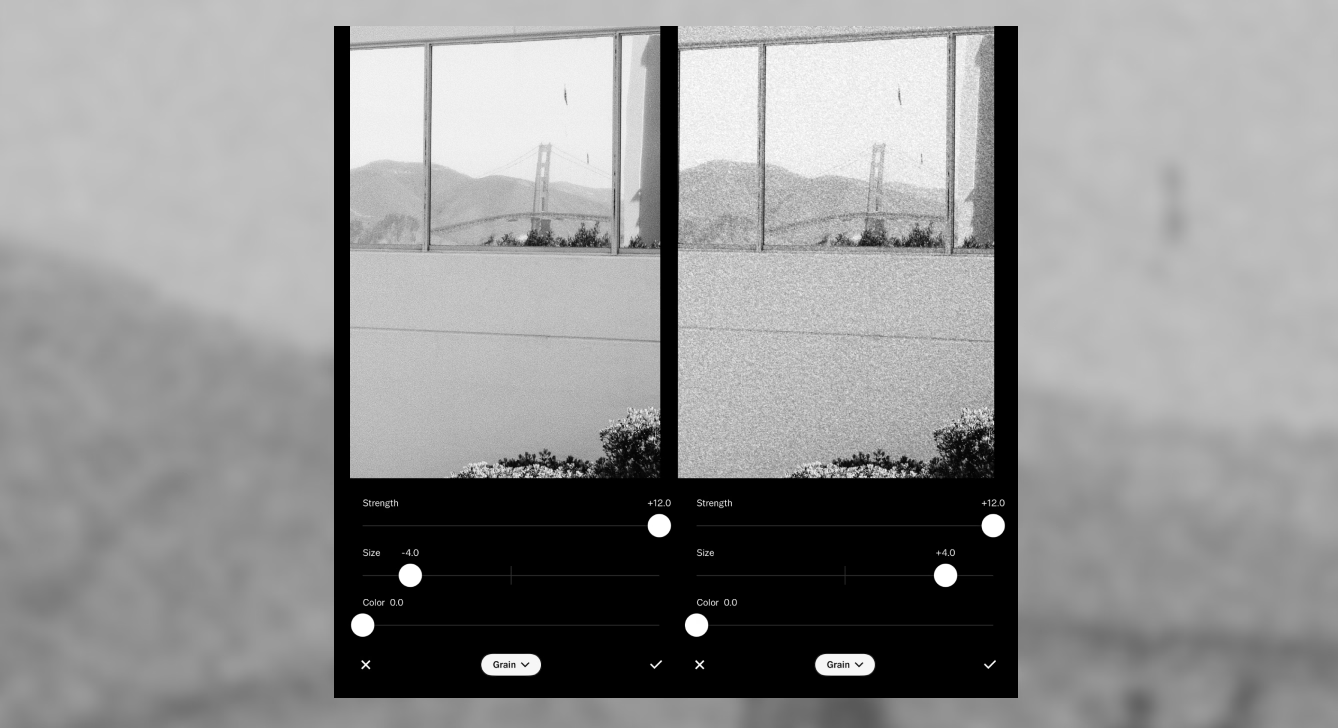
For black and white films, it makes sense to leave this one at 0, since there’s no color in black and white grain.
But color films will have at least a subtle color grain in the real thing, since each color channel has grain. So, the color slider allows you to add some more realism to your grain texture for color images.
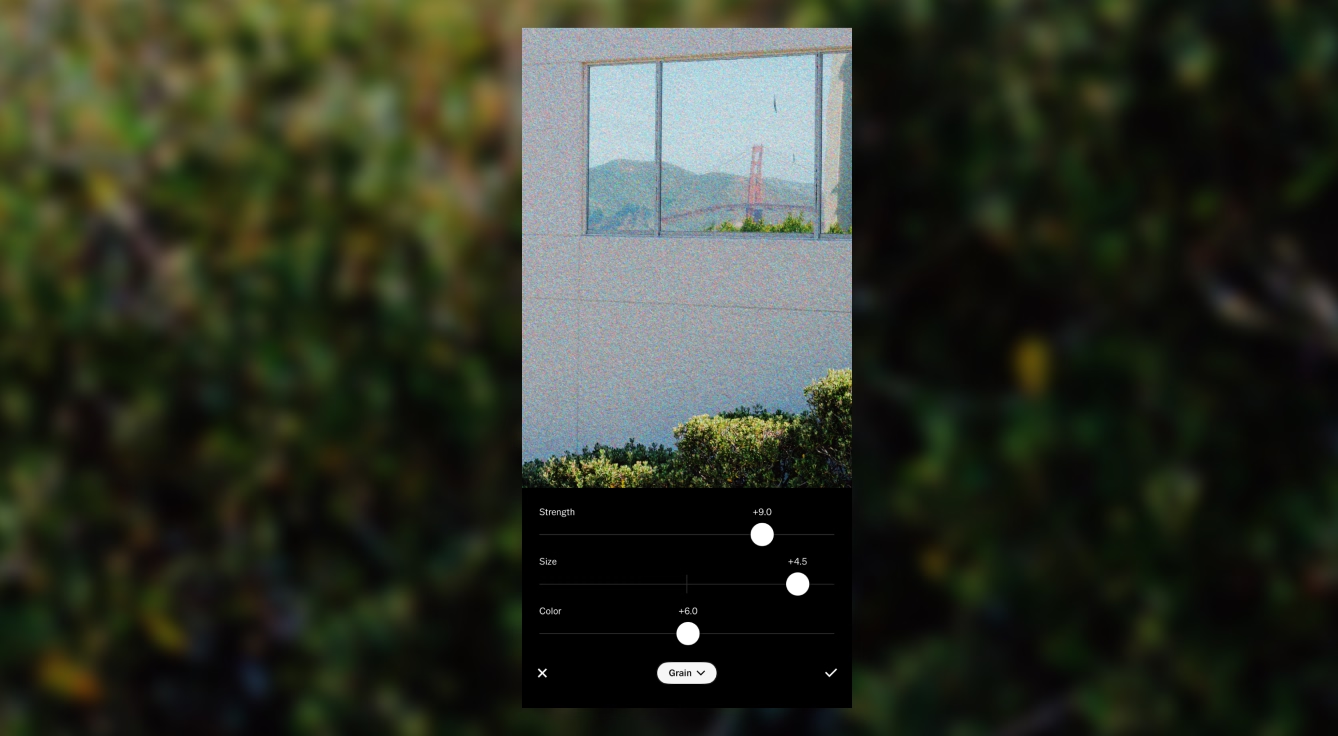
You could stop here, but if you want to put some extra finishing touches on your film look, you can keep reading to learn about using Film (FX) Effects.
While the Grain tool is generating texture and noise based on the controls you set, VSCO's Film FX photo effects contain scans of real films that can be overlaid on top of your image for an authentic film look.
To start, let’s look at the Texture section — this contains dust and scratch effects made from real film scans, as well as additional grain types, and you can really get some great looks here.
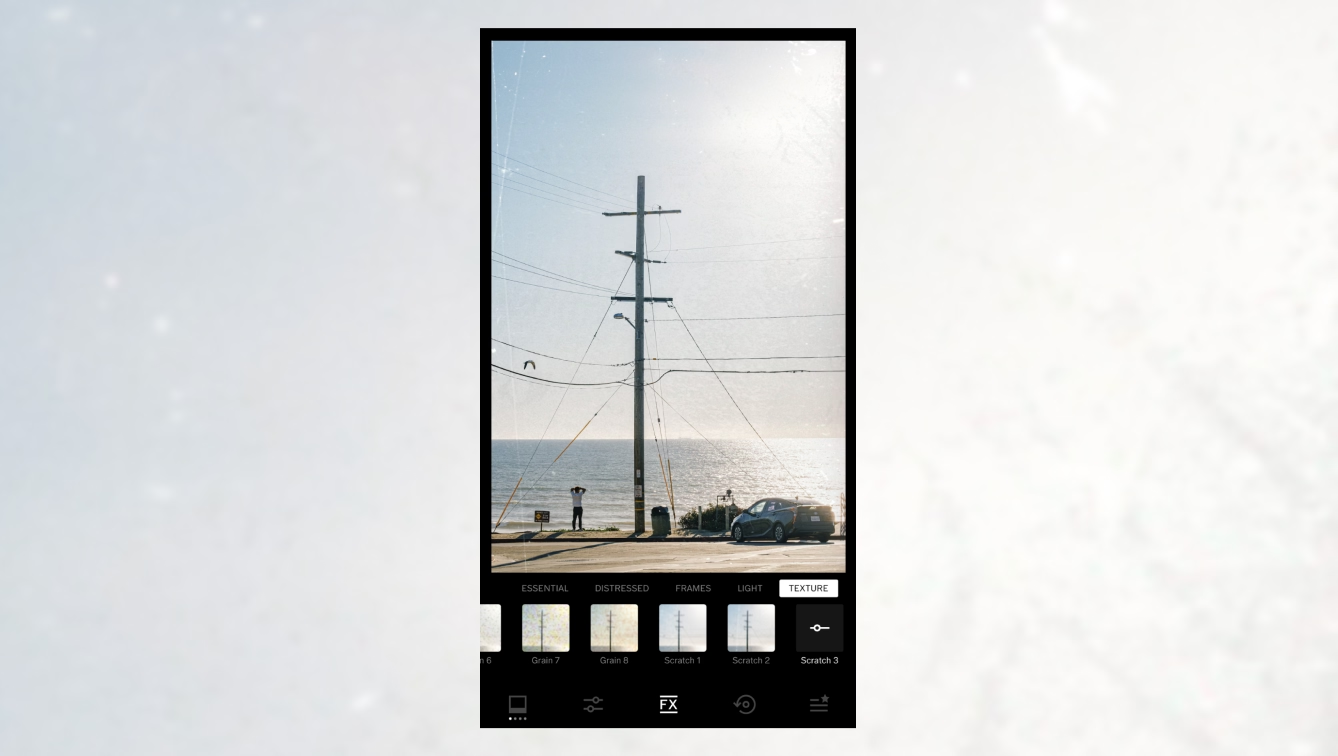
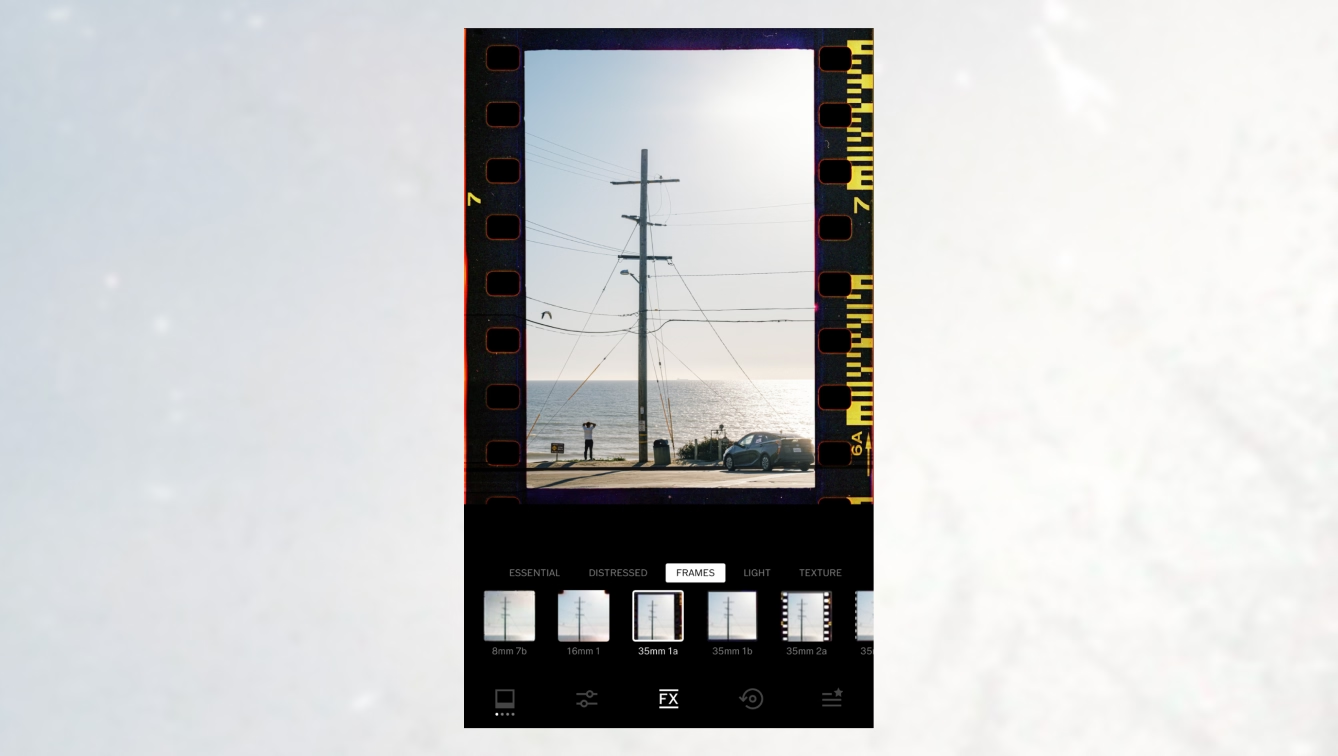
Additionally, there are film frames, which will simulate the look of over scanned film. There are options here for various types of film, as well as color and black and white film. Be careful not to add a color border to a black & white image, or visa versa!
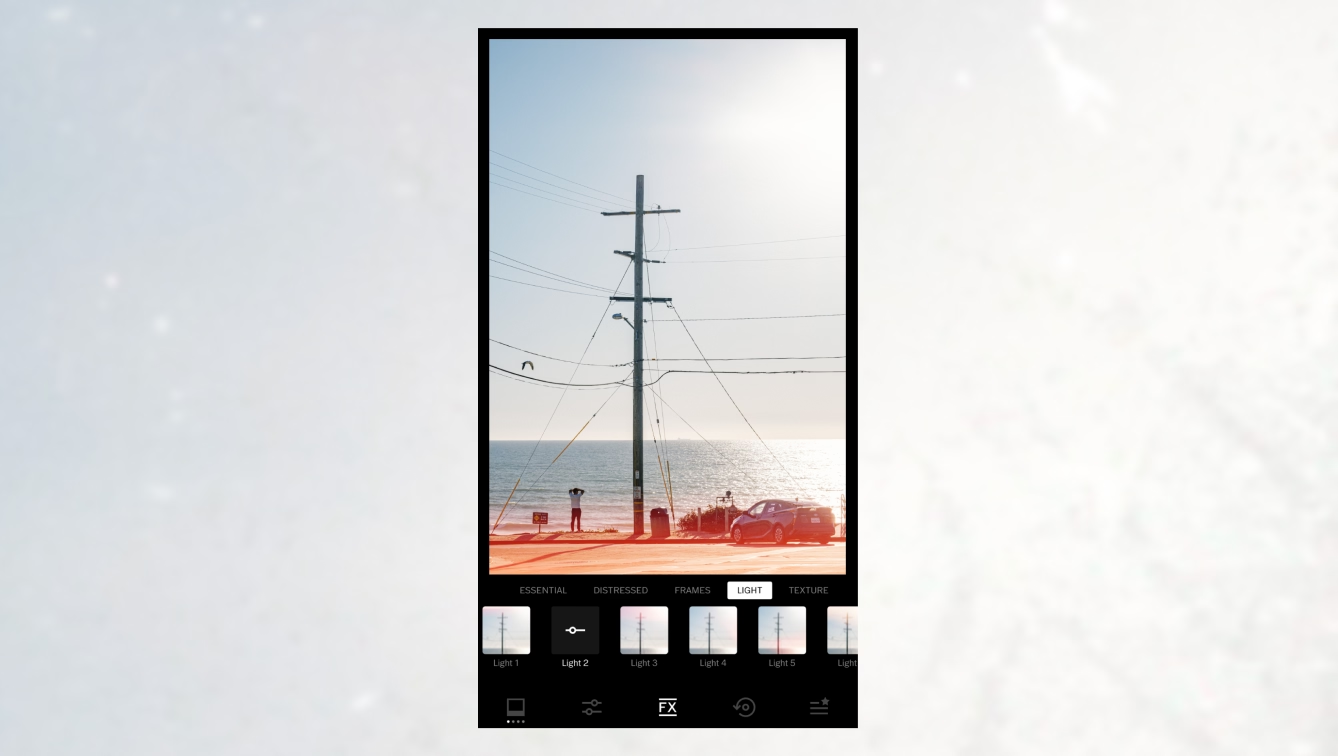
The Light Leaks category simulates light “leaking” onto the film from an old or cheap camera like a Holga. This often results in red and orange clouds of color appearing on your image. Learn more about adding light leaks and lens flares to photos.
Lastly, there is the Distressed section with some very strong effects to play with in here that can amp up the film effect. Don’t forget that you can turn down the strength of all of these, so a distressed look can still be subtle as well.
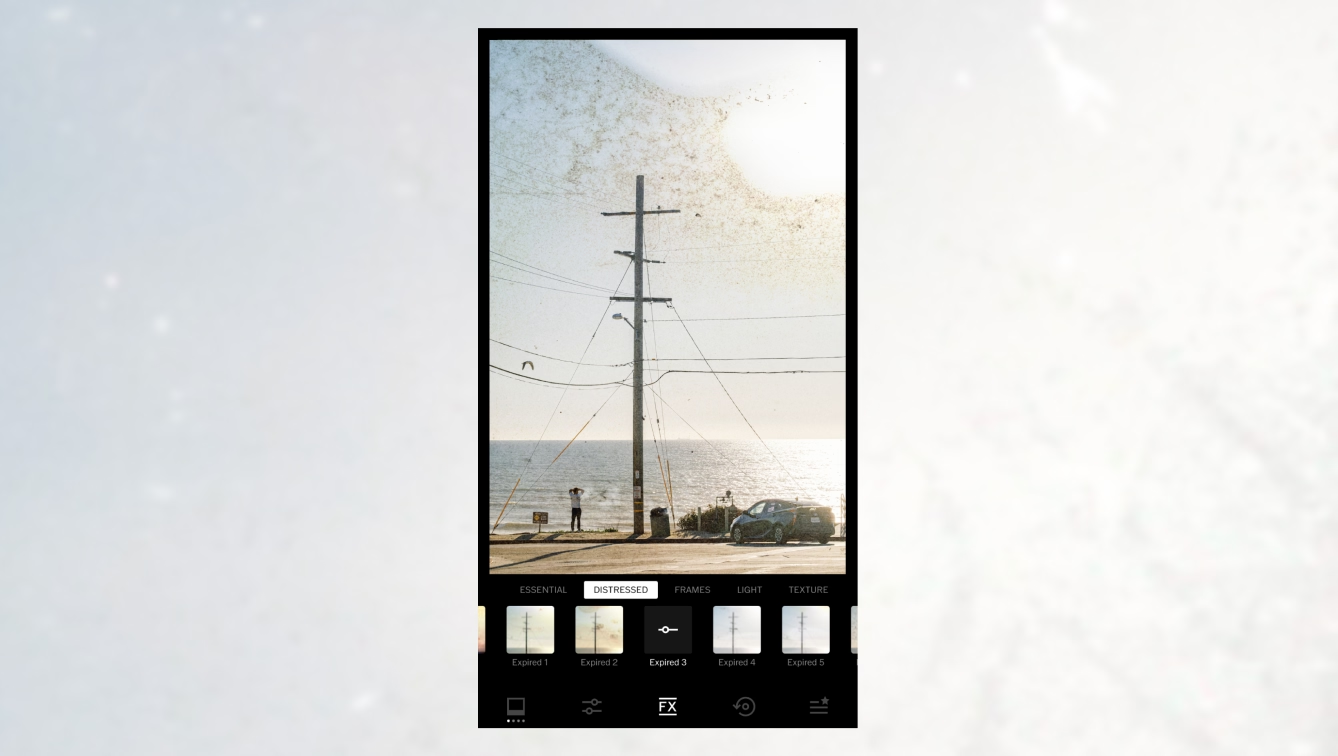
If you want to combine multiple film textures, just save to your camera roll and re-import the copy. A much faster way to do this, however, is to simply use the “Flatten duplicate” function in the VSCO mobile app or desktop editor.
We’ve covered a lot, but we’re still not done! Up next, we’ll look at how we can take our film look even farther with additional tips and tricks.
Film aesthetic techniques
If you still haven’t had enough of our deep dive on film emulation, it’s time to explore some additional tips and tricks in the VSCO app to get our film look to the finish line.
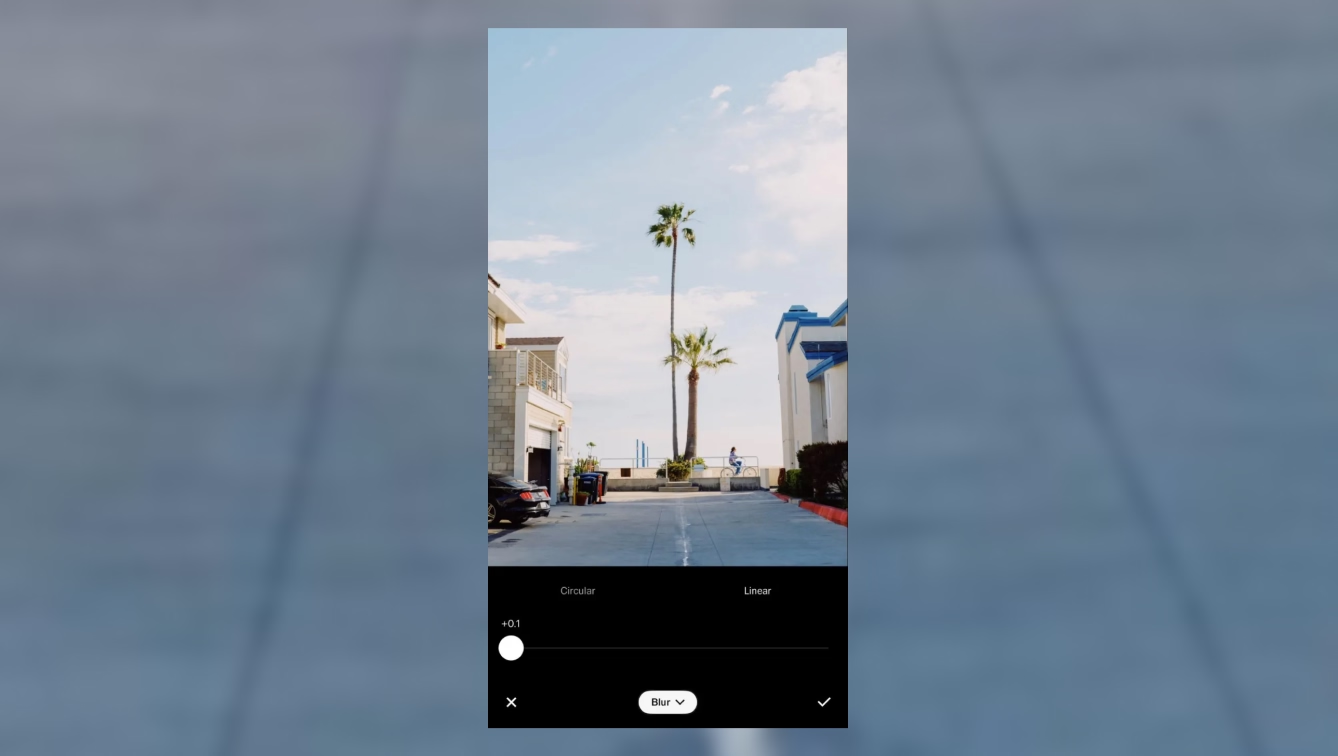
Digital is very sharp, and film doesn’t lack resolution, but it’s not sharp in the same way, so a very sharp image can be a giveaway if you’re trying to simulate film.
Use the VSCO Blur photo tool to add a very subtle blur to the entire image by dragging the linear blur out of the frame and turning it down very low.

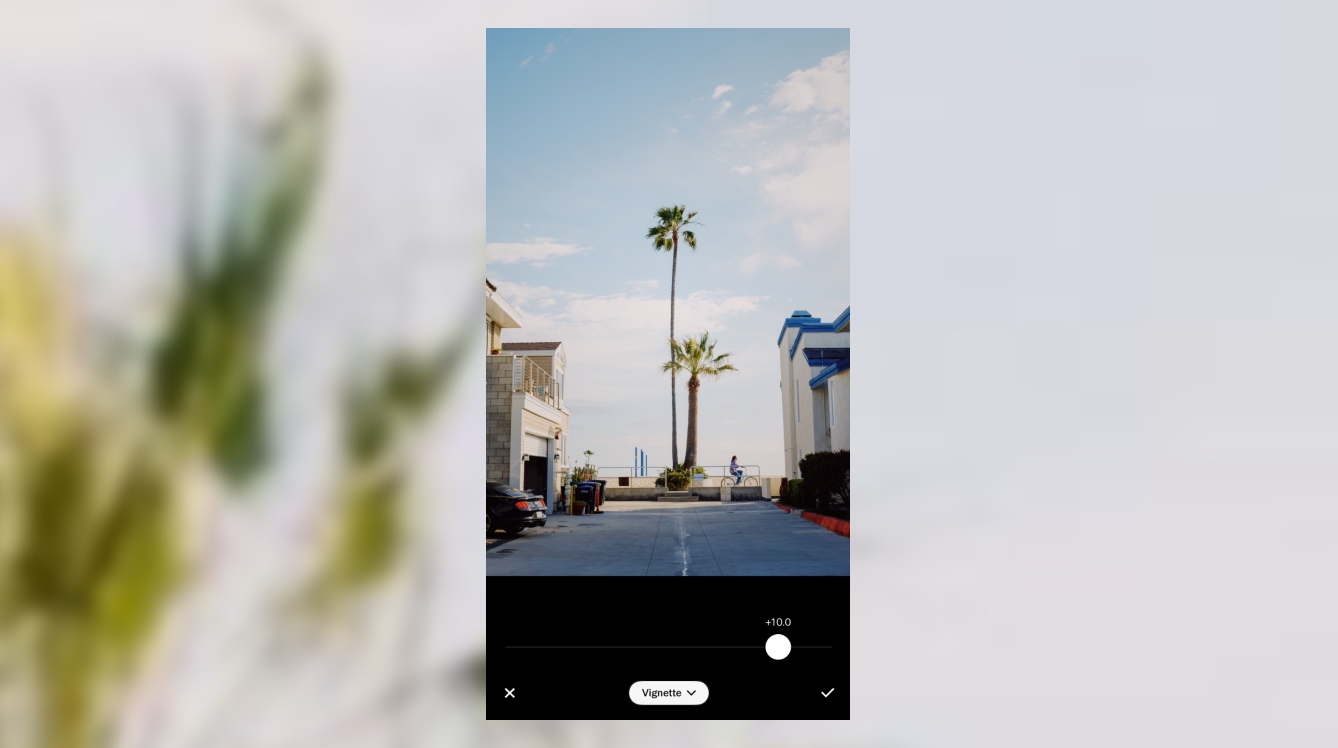
Vignetting is a lens effect that darkens the edges of the frame, especially in low light or portrait type shots. It’s not strictly a film effect, but it’s one that a lot of film shots would likely have since film cameras use lenses. Phones and many digital cameras remove the vignetting from their lens, so adding a little back in can help.

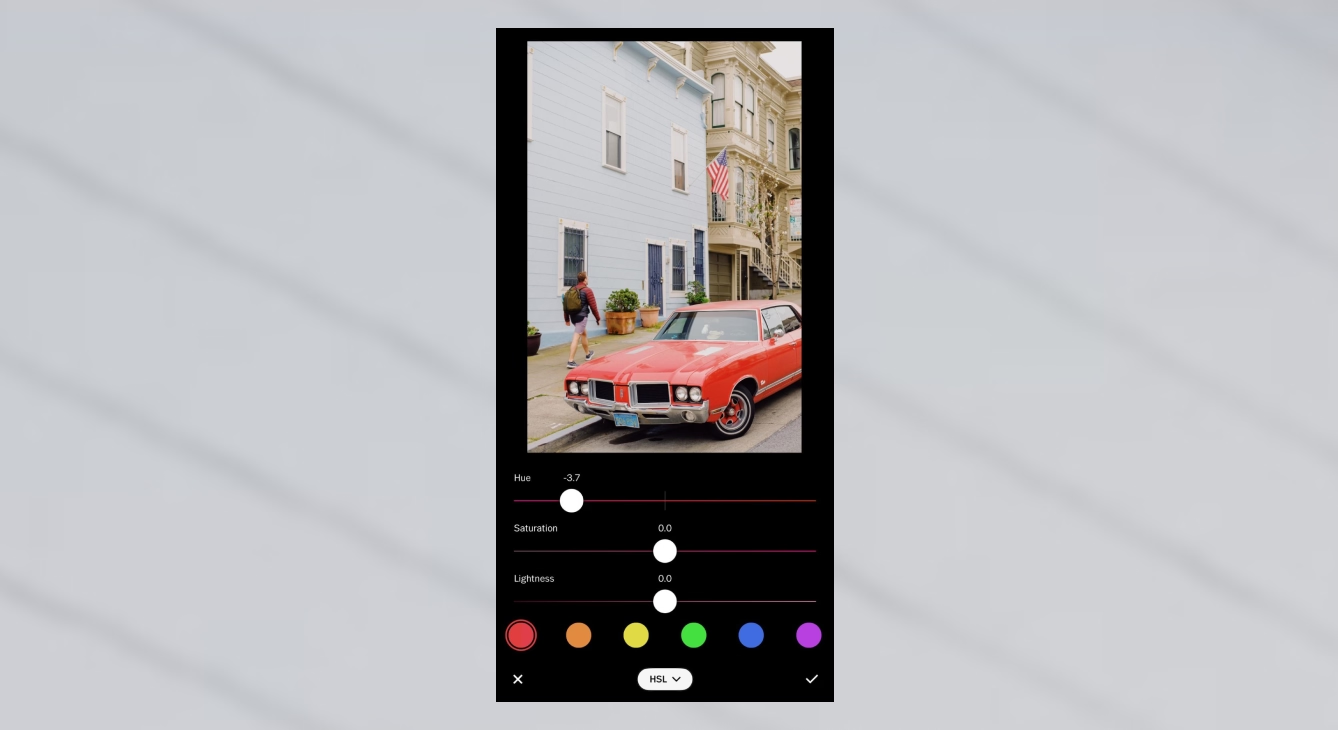
HSL is always great for fine-tuning colors that aren’t quite where you’d like them. Film often turns reds kind of orange, especially with the Fuji Frontier scanner, so a common use case here is to use HSL to bring the reds back towards red by adjusting the Hue slider. Learn more about our HSL editor.
Especially in black & white, dodging and burning is often a big part of the printing process. Try using the Dodge & Burn tool to bring more attention and drama to your black & white images to simulate that darkroom process.
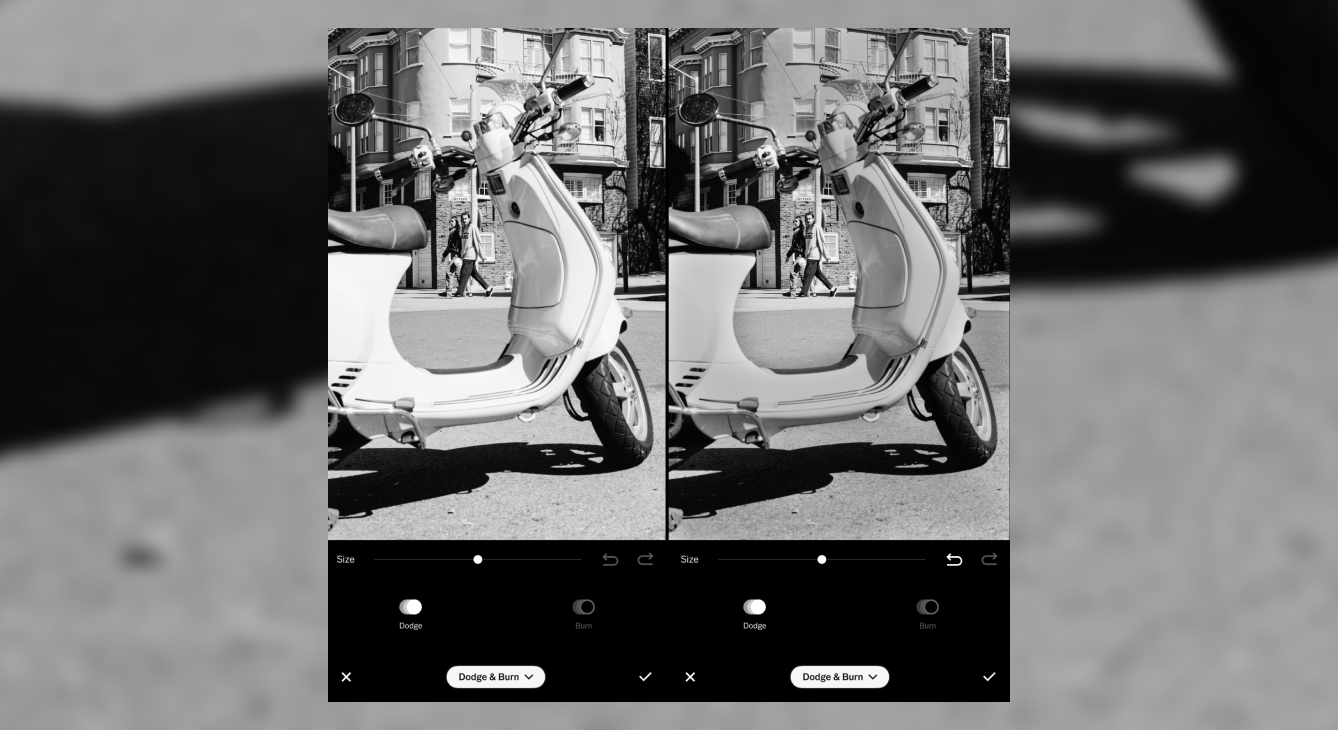
Notice how the scooter and the building have been darkened to draw more attention to the people
Dodge brightens the image, while Burn darkens the image. Brush with your finger on the image to add the effect, and do multiple passes to increase the amount of the effect. In general, your viewer’s eye will be drawn to brighter tones, so use Dodge to bring attention where you want it, and use Burn to diminish attention on areas you want in a more supporting role.
The Bloom effect is actually a lens effect, but it’s is often associated with the film look. It’s most noticeable at night on points of light, like a street light against a black sky, where a soft glow surrounds the light as the light “blooms” to the surrounding areas. Traditionally, this effect has also been used to smooth out skin tone or to create a more dreamy look as well.
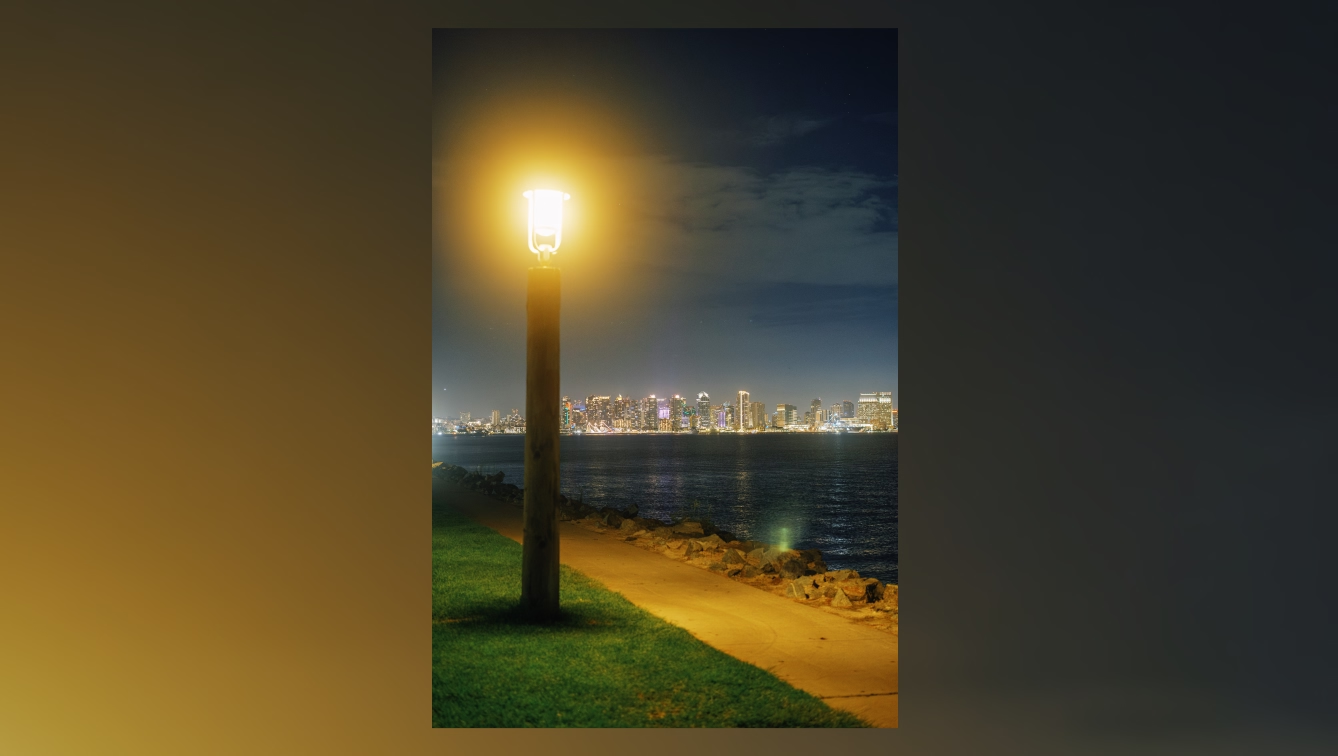
Use the VSCO Bloom tool to create this effect, using the Range control to set what brightness levels get the effect, and then setting the Size and Strength of the effect to taste.
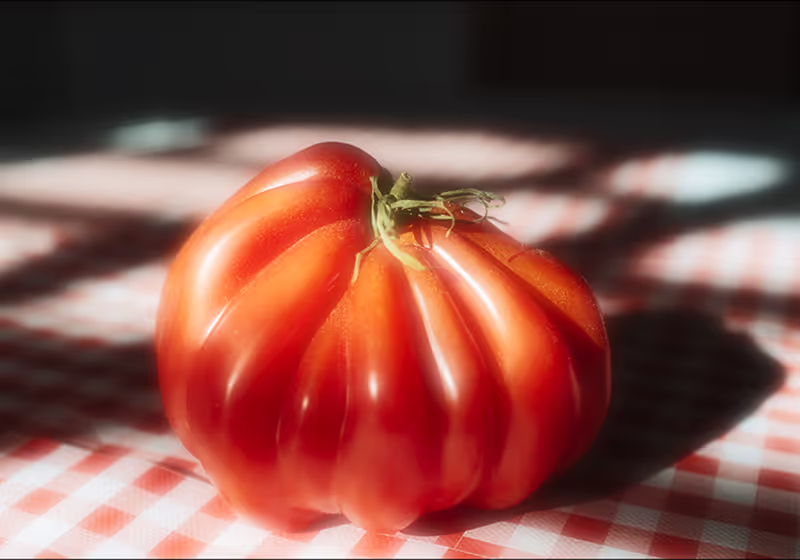
Halation is what happens when light bounces off the back of film, creating a characteristic red glow around light sources such as a car headlight at night. You see this in older movies shot on film, and modern films like Cinestill are also known for this. Originally it was an unwanted side-effect of film, but it has become desirable in the digital age for adding character and interest, especially for night scenes.
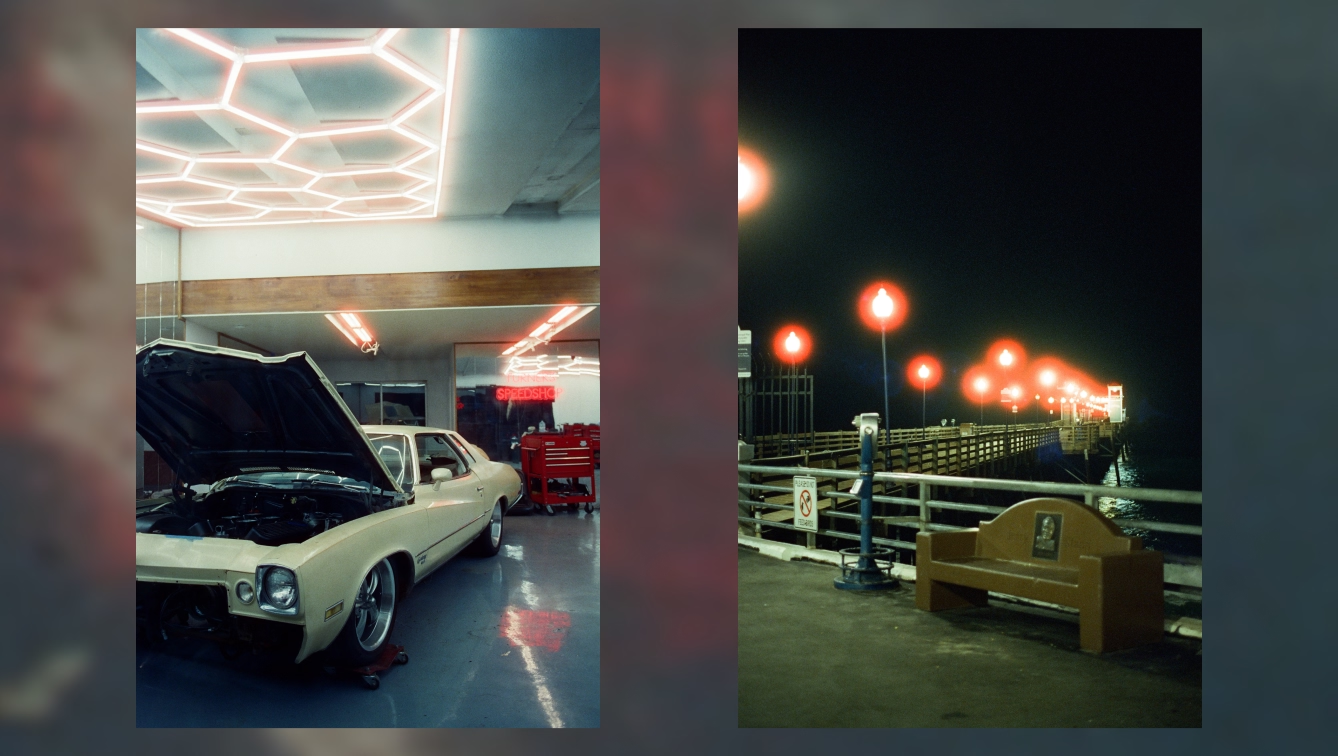
Use the VSCO Halation tool to create this effect, using the Range control to set what brightness levels get the effect, and then setting the Size and Strength of the effect to taste. The additional tint control can be used to shift the color of the bloom towards orange or magenta, which can help create more realism or color contrast.
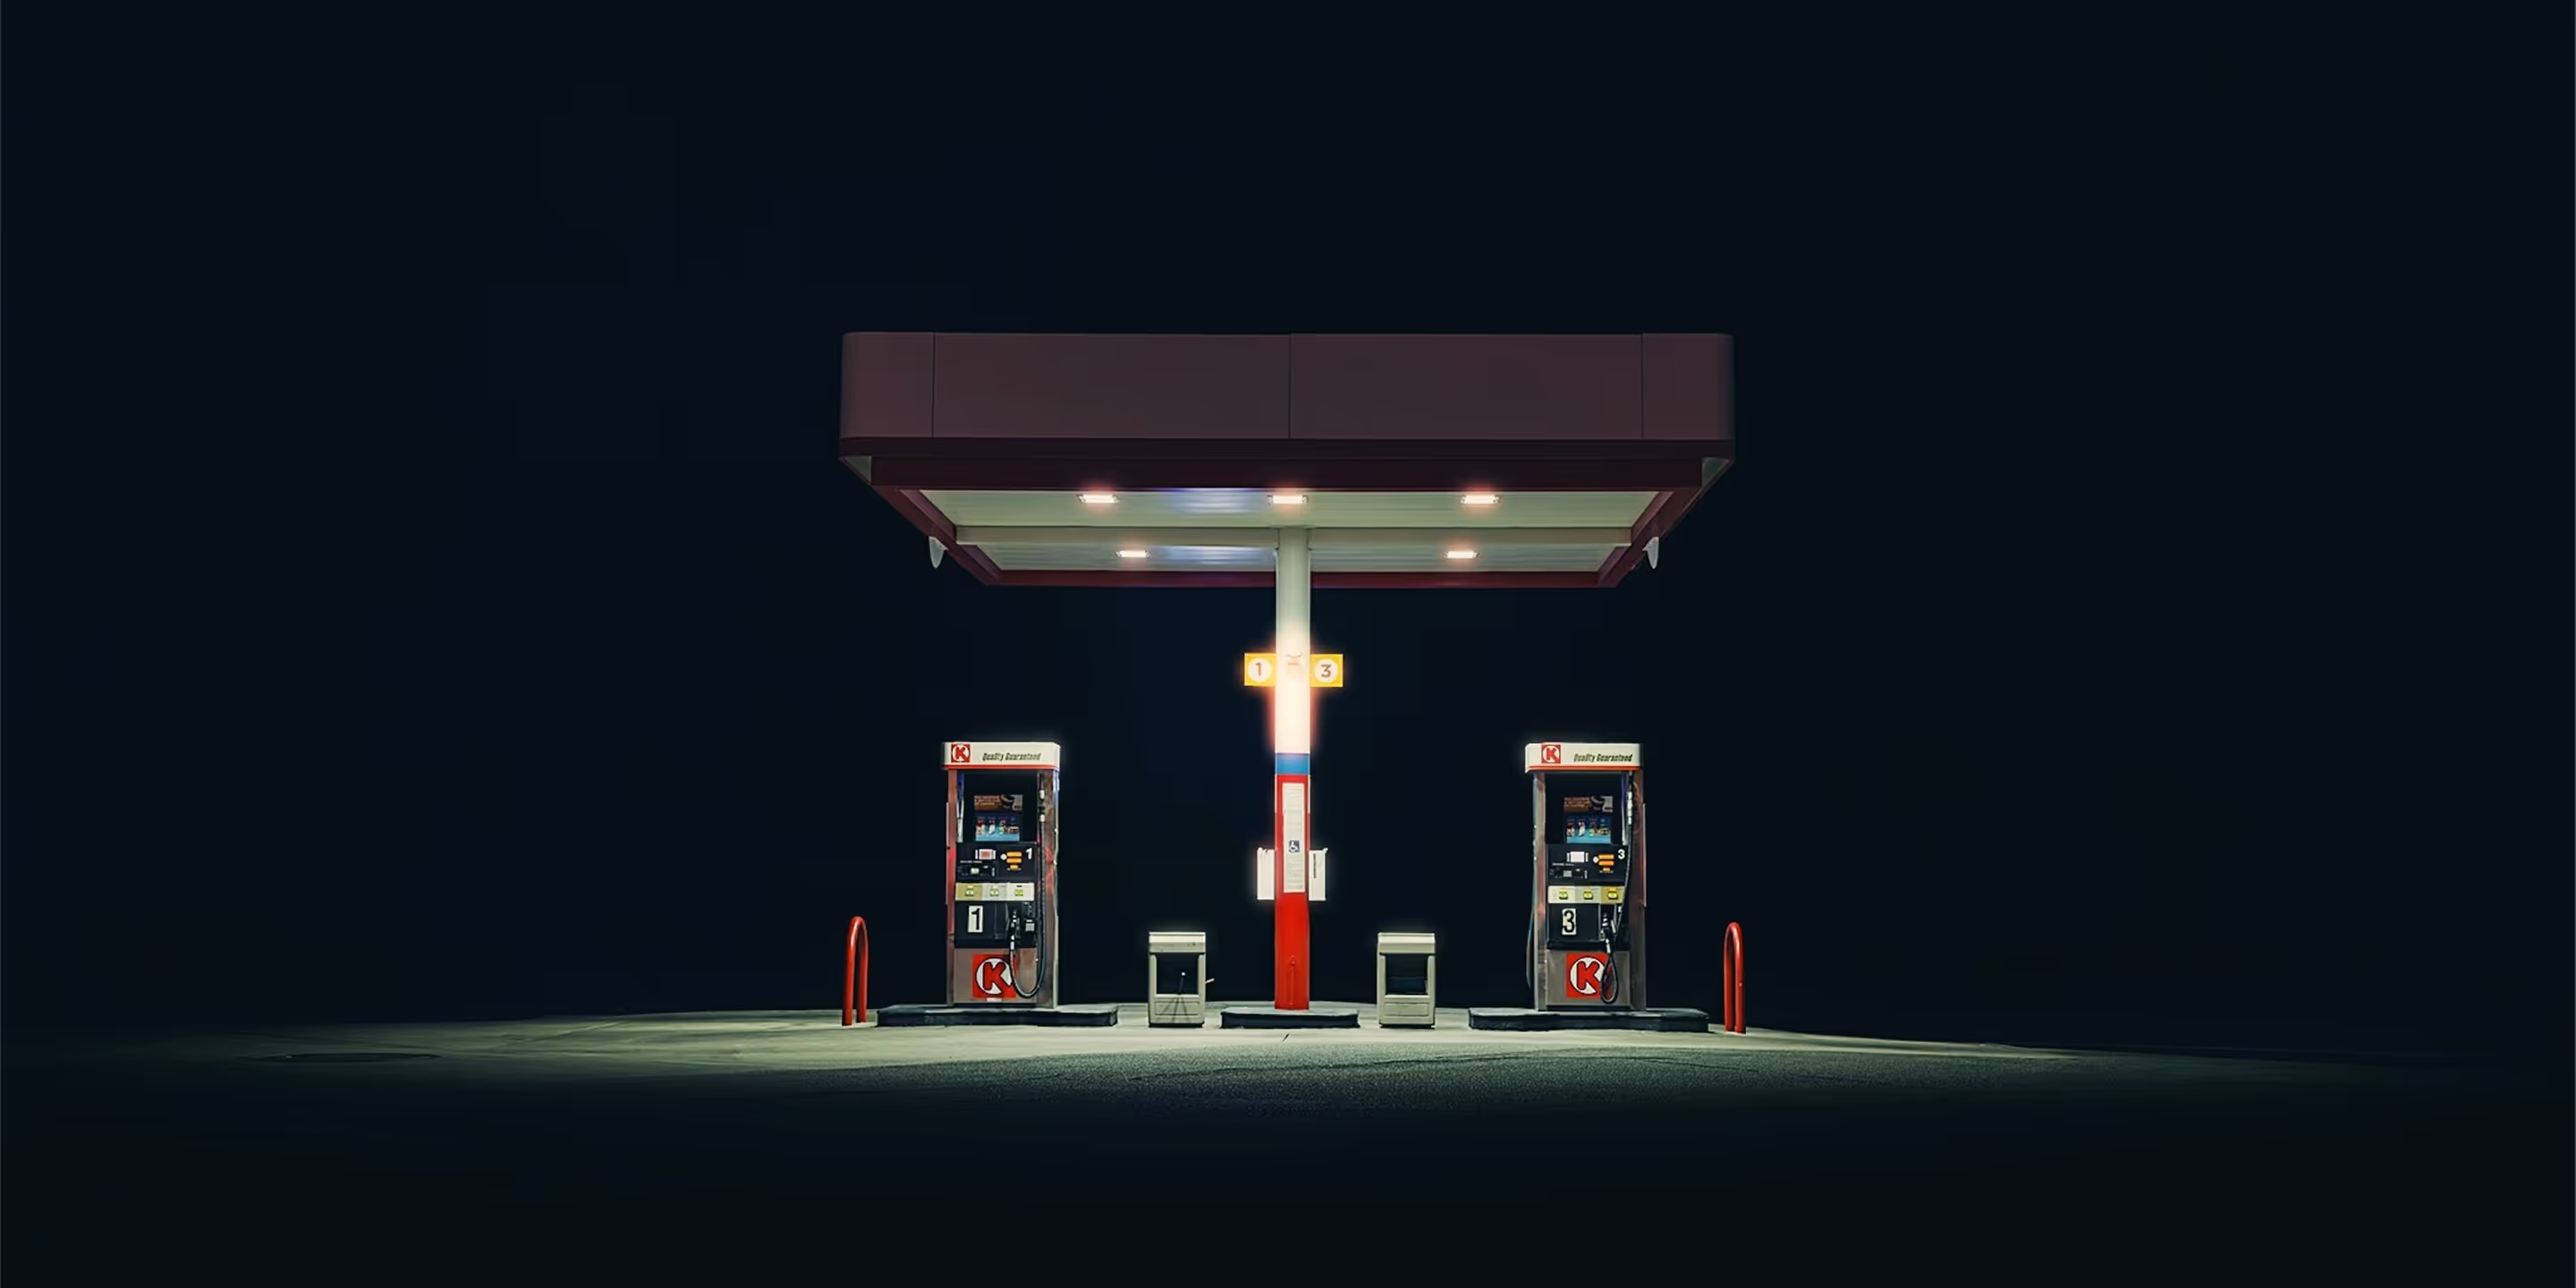
While much of this guide focuses on recreating the look of film in post, you can also get closer to a film aesthetic at the moment of capture using the VSCO Capture camera app.
VSCO Capture applies film-inspired color science live as you shoot, giving you a more intentional starting point before you ever open the editor. Instead of capturing a neutral, heavily processed smartphone image, you’re composing with film-like tonality, contrast, and color response in real time — much closer to how shooting actual film feels.
With VSCO Capture, you can:
- Preview film-inspired looks like Kodak Kodachrome KC25 live while composing your shot, helping you make creative decisions before pressing the shutter
- Manually control exposure and shutter speed, letting you shape motion blur and highlight roll-off more intentionally
- Adjust ISO to influence image sensitivity and noise characteristics at capture
- Set white balance manually, rather than relying on automatic corrections that can neutralize color mood
- Add Grain in real time to introduce film-like texture and grit as you shoot, not after
- Apply Bloom and Halation in real time, adding characteristic glow and highlight behavior associated with film
After capturing your photo, you can still fine-tune the result using presets, Grain, and more film effects in the main VSCO app, but starting with VSCO Capture often means fewer adjustments are needed — and the final image feels more natural and believable.
If you want your digital photos to feel more like film from the very beginning, VSCO Capture is one of the most effective ways to get there.

How can I make my photos look like film?
To make photos look like film, focus on three core elements: film-inspired color tonality, realistic texture, and intentional finishing touches. Start by applying a film-style color profile that mimics how real film handles contrast and color, especially in highlights and shadows. Next, add grain thoughtfully to introduce texture and reduce the overly clean look of digital images. Finally, refine the image with subtle effects like blur, vignetting, bloom, or halation to recreate how light and lenses interact with film.
What actually makes a photo look like film?
A film look is created by a combination of color tonality, contrast response, and texture. Film tends to handle highlights more gently, compress contrast in a pleasing way, and introduce subtle color shifts — such as cooler greens, cyan-leaning blues, and warm highlights — along with visible grain that adds texture and character.
Is grain alone enough to make a digital photo look like film?
No. Grain is an important component, but on its own it won’t convincingly replicate film. Without film-like color response, contrast behavior, and highlight roll-off, grain can make an image look noisy rather than analog. The most realistic results come from combining film-inspired color tonality first, then layering grain and texture intentionally.
Why do film photos often feel softer than digital images?
Film images aren’t necessarily less detailed, but they render detail differently. Digital images are often extremely sharp with high micro-contrast, while film combines fine detail with grain and gentler edge transitions. This creates a perception of softness while still preserving texture and depth.
Start making your photos look like film
At last, we have covered everything you need to create a film look with the VSCO app. Now, all that remains is for you to get started! Try using a film filter, add film grain, and experiment with the tips that we’ve talked about here and see what you can come up with.
If you create something you like, we’d love to see it, I would love to see it. If you share it on VSCO and use the hashtag #vsco that will definitely increase our chances of seeing it, so I’d encourage you to do that.
And, if you’ve made it this far, thank you! I hope I’ve been able to help you get closer to the look of film and maybe learn a little bit along the way.